
Build a Gladiator That Carries the Trip Without Ruining the Truck
An owner reported a travel weight of 6,820 pounds against a stated 6,450-pound GVWR. Use your truck's label to budget people, shelter, gear and supplies.
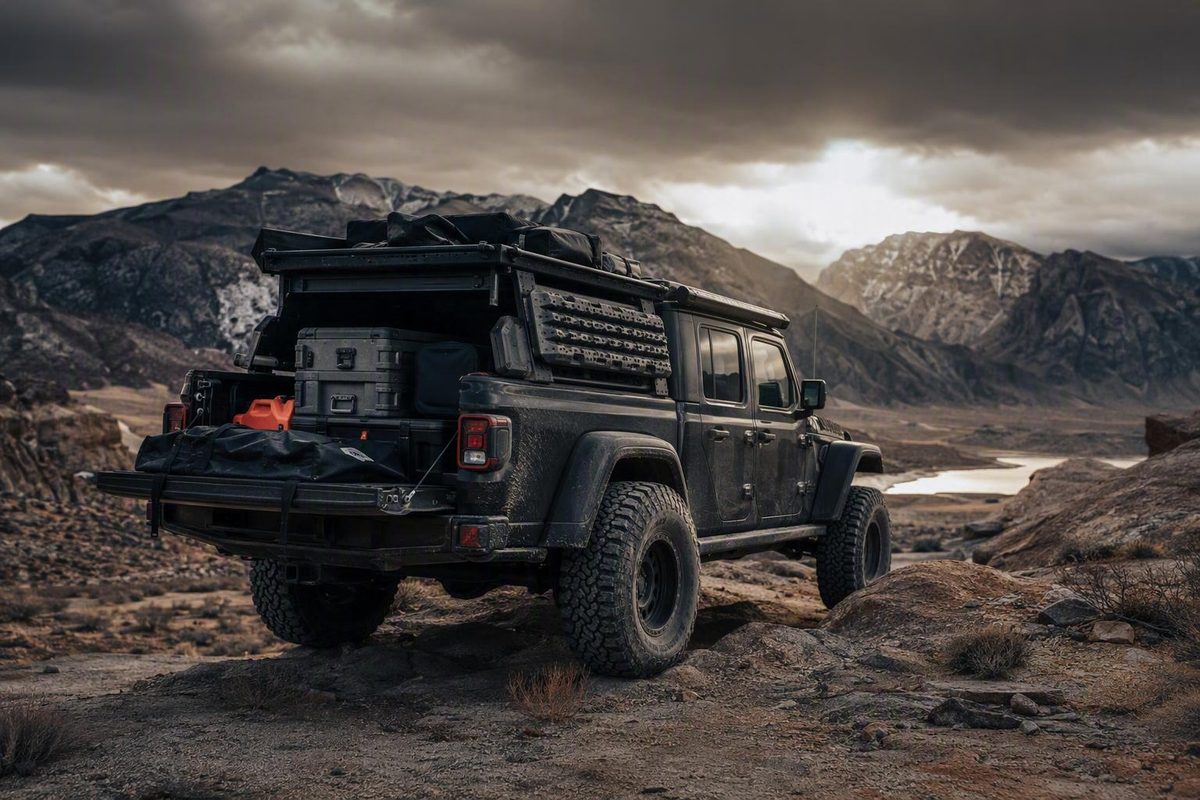
A practical Gladiator overlanding setup begins with subtraction, not shopping. The goal is not to reproduce a showcase truck with the largest tires, tallest suspension, and most elaborate camper. It is to build the lightest configuration that meets your actual terrain, sleeping, storage, recovery, and camp needs while remaining within the limits of your specific truck.
That approach protects more than payload margin. It helps preserve predictable handling, daily usability, accessible storage, and the freedom to change the setup as your travel style evolves.
Define the trip before choosing the equipment
Start with a six-part planning brief:
- Intended terrain: maintained gravel, rough forest roads, sand, desert tracks, technical rock trails, snow, or a mixture.
- Typical trip duration: overnight, weekend, five-day loop, or extended remote travel.
- Occupants: adults, children, pets, and their personal equipment.
- Camp-move frequency: one base camp or a different site every night.
- Daily-driver requirements: parking height, noise tolerance, open-bed utility, commute comfort, and whether equipment must be removable.
- Budget: purchase price, installation, maintenance, replacement, and any supporting modifications each choice may trigger.
These questions should determine the build. Moderate forest-road travel and dispersed camping rarely demand the same configuration as technical trails, desert travel, or long stretches without dependable resupply. A photographed expedition truck may be useful for ideas, but it does not define what every owner needs.
Camp rhythm is especially important. If the truck remains at one campsite for several nights, a roomier shelter with a slower setup may be a fair compromise. If camp moves every morning, deployment and pack-down become central design criteria. Bedding that stays in place, a quickly deployed awning, and storage that closes without repacking may matter more than standing room or an elaborate kitchen.
In an owner-authored Overland Bound build thread, Guido GNE described moving from a rooftop tent and then a camper trailer to a Gladiator canopy camper. His targets included a sleep-ready bed in less than a minute, an awning deployed in roughly 30 seconds, protection from rain and insects, and acceptable day-to-day usability. He also reported that changing campsites nearly every day had caused trailer setup and pack-down to consume about an hour on some travel days. Those are personal observations, not universal performance specifications, but they demonstrate why travel rhythm should control shelter selection. His broader recommendation was to begin with simple camping and identify genuine frustrations before buying a complex system (Overland Bound owner build account).
Classify every proposed item in one of three columns:
| Classification | Meaning | Examples |
|---|---|---|
| Always installed | Remains on the truck for commuting and every trip | Bumper, sliders, permanent camper, fixed drawers |
| Trip-specific | Installed or packed only when the route requires it | Rooftop tent, extra recovery equipment, portable refrigerator, traction boards |
| Consumable | Changes during the trip | Water, food, auxiliary fuel, propane |
This exercise exposes weight that would otherwise remain on the truck every day. It also separates a permanent requirement from equipment needed only once or twice a year.
Before committing to a camper, large electrical installation, or major suspension change, take several simple trips with ordinary camping equipment. Record what actually causes trouble: poor weather protection, inaccessible cargo, inadequate sleeping space, slow setup, insufficient water, dead electronics, or lack of secure storage. Spend money on documented problems rather than imagined ones.
Choose a Gladiator configuration by use case, not reputation
Rubicon, Mojave, and Sport Max Tow configurations represent different starting points. None is the automatic winner for overlanding.
Rubicon-based builds commonly emphasize technical-trail equipment. The cited build profiles and specialist commentary describe factory front and rear differential lockers, Dana 44 axles, higher fender flares, and an electronic sway-bar disconnect. Those features can reduce the aftermarket work required by owners who genuinely expect technical terrain. They do not eliminate the need to plan payload, shelter, tires, or suspension around the completed load.
A different argument favors a Sport equipped with Max Tow when carrying capacity and value matter more than factory technical-trail hardware. In a 2020 Overland Journal discussion, one host preferred the Rubicon for its trail equipment, while another favored the Sport Max Tow and cited a 1,700-pound payload for the particular configuration being discussed. That is an old, configuration-specific figure—not a current specification for every Sport Max Tow or model year (Overland Journal Gladiator discussion).
The Mojave represents another set of priorities. Owner Doug Stokes selected one for desert-oriented tuning, durability, moderate off-road use, and daily driving. His modular build added a removable rack, rooftop tent, gear boxes, and recovery tools in adventure mode, then returned to a lighter tonneau-covered configuration for ordinary use. That is a useful example of removability rather than proof that the same equipment suits every Mojave.
Use this matrix as a screening tool:
| Starting configuration | Investigate it when… | Questions to answer before choosing |
|---|---|---|
| Rubicon | Factory technical-trail hardware is central to the plan | Will you use the lockers and disconnect often enough to justify the configuration? What capacity remains after options and permanent equipment? |
| Mojave | Desert-oriented travel, ride preferences, durability, and moderate trail use lead the brief | Does its equipment suit your terrain? How much capacity remains for the shelter, passengers, and supplies? |
| Sport Max Tow | Capacity and value matter more than maximum factory trail equipment | What does the individual truck’s label state? Which traction and protection upgrades are genuinely necessary? |
Engine, transmission, model year, factory options, and installed equipment can change available capacity. Current documentation for the applicable model year and the labels on the individual truck must settle the decision—not a trim-level number copied from an old article.
The Gladiator combines a five-foot bed with broad modification options, creating several shelter and storage paths. That flexibility comes with tradeoffs. Commercial outfitter Nomad Outfitters describes the platform as louder, less comfortable, and more fatiguing than some competing vehicles, even while valuing its bed, trail hardware, and modification potential. Treat that as outfitter commentary rather than comparative test data (Nomad Outfitters’ Gladiator build guide).
Build the payload worksheet before the parts list
Begin with the specific truck, not a generic online payload range. Record the door-jamb payload information and obtain the current official documentation for that model year and configuration. Online figures can screen possible trucks, but they cannot establish the allowance for the vehicle in front of you.
Build an itemized worksheet with at least these entries:
| Category | Item | Weight | Location | Fixed, trip-specific, or consumable |
|---|---|---|---|---|
| People | Driver, passengers, children, pets | Cab | Trip-specific | |
| Vehicle | Bumpers, sliders, armor, winch | Front/middle/rear | Fixed | |
| Shelter | Rack, topper, tent, camper, awning | Bed/roof | Fixed or trip-specific | |
| Storage | Drawers, cases, kitchen modules | Bed | Fixed or trip-specific | |
| Recovery | Straps, shackles, boards, jack, tools | Trip-specific | ||
| Water | Drinking, cooking, and washing supply | Consumable | ||
| Fuel | Auxiliary gasoline or diesel | Consumable | ||
| Food | Food and cooking supplies | Consumable | ||
| Electrical | Battery, solar panels, wiring, inverter | Fixed | ||
| Camp | Refrigerator, stove, chairs, bedding | Trip-specific | ||
| Personal | Clothing, cameras, recreation equipment | Trip-specific |
Include mounting hardware. A tent’s listed mass is not the installed-system mass if it also requires a rack, crossbars, brackets, fasteners, an awning, and accessories attached to the same structure.
Use a simple subtraction sequence:
- Start with the allowance shown for the individual vehicle.
- Subtract all fixed modifications.
- Subtract occupants and pets.
- Subtract trip-specific shelter, recovery, storage, and camp equipment.
- Subtract consumables at the quantities planned for departure.
- Preserve a margin rather than treating the last available unit of capacity as a packing target.
A symbolic worksheet avoids pretending that one generic number applies to every truck:
Remaining allowance = individual vehicle allowance − fixed equipment − occupants − trip equipment − departure consumables
Then divide the remainder by the number of travelers if that makes the constraint easier to see. A plan that leaves almost nothing per person for water, food, clothing, and personal equipment needs revision before parts are ordered.
Perform a separate rear-load audit. Campers, drawers, kitchens, refrigerators, water containers, spare fuel, recovery tools, and rear-mounted spares can concentrate mass behind the cab. Total vehicle weight alone does not show how the load is divided between the front and rear axles.
An owner-authored JeepGladiatorForum journal provides a cautionary example. The owner reported a travel weight of 6,820 pounds against a stated 6,450-pound GVWR. On rough terrain, he described excessive roll, pitch, and yaw, speeds below 8 mph, and dropping below 5 mph through whoops because of concern about reaching the bump stops. The same journal listed a 6,340-pound daily-driver weight with the rear seats removed and the canopy camper installed, although the excerpt does not clarify whether occupants were included in that weighing (owner-reported Gladiator weight and handling account).
That experience describes an overloaded configuration and must not be used to predict how a compliant Gladiator will behave. Its value is narrower: ordinary additions—including a camper, drawers, water, food, tools, a compressor, recovery equipment, auxiliary fuel, cooking gear, and traction boards—can collectively erase an apparently comfortable margin.
Use four weigh-ins where practical:
- Baseline state: before major modifications.
- Fixed-modification state: permanent armor, bumper, winch, camper, rack, or drawers installed.
- Daily-driver state: the way the truck normally operates.
- Fully provisioned travel state: occupants, full departure supplies, water, auxiliary fuel, and all trip equipment.
Obtain total and axle-specific readings. Compare the total reading with the applicable vehicle limit, the front reading with the corresponding front-axle limit, and the rear reading with the rear-axle limit. Tire, wheel, rack, and camper limits also need to cover the completed configuration and intended use. Use the actual labels and manufacturer documentation rather than values reported for another owner’s truck.
Finally, separate ride correction from certified carrying limits. Springs, shocks, sway-control changes, bump-stop changes, or air bags may address sag, damping, or movement, but they should not be treated as new payload, GVWR, or axle ratings. The available evidence includes owner and forum guidance—not vehicle certification documentation—so settle the limit question using the truck’s labels and applicable official material. If the worksheet is over budget, remove mass or choose a different architecture rather than trying to conceal the problem with a taller spring.
Select the shelter and storage architecture
The shelter decision determines much of the truck’s installed mass, storage access, weather protection, setup routine, and daily behavior. Compare complete installed systems rather than isolated tent or camper specifications.
| Configuration | Complete installed mass and weight placement | Sleeping, weather, and setup | Storage and bed access | Removability and daily impact |
|---|---|---|---|---|
| Removable bed rack with rooftop tent | Can be comparatively light if the rack, brackets, tent, and accessories are all modest; the complete weight remains elevated above the bed | Separate elevated sleeping area; capacity, protection, and deployment depend on the tent | Preserves storage below, but rack legs, ladder position, and tent geometry can restrict access | Potentially removable and compatible with open-bed use between trips |
| Topper or shell with a tent | Adds the shell, tent, rack or crossbars, and mounting hardware; weight remains above the bed rails | Enclosed cargo area plus a separate sleeping platform | Better cargo security and weather protection; side and rear opening geometry controls access | The tent may be removable even if the shell stays installed |
| Integrated canopy or pop-up camper | Complete mass may become substantial once awning, drawers, refrigerator, battery, water, and hardware are counted | Combines sleeping with enclosed living or storage space; can support rapid setup and ready bedding | Strong weather protection and convenient interior access, depending on layout | Commonly remains installed and affects commuting, parking, and open-bed utility |
| Bed-replacement or tray system | Must be evaluated as a complete replacement, including removed factory parts, tray, boxes, camper, and utilities | Can integrate sleeping, exterior storage, and camp systems | High customization potential and multiple exterior access points | Least easily returned to an ordinary pickup-bed configuration |
Do not assume any architecture is always the lightest. Compare actual installed weights, including every bracket, crossbar, awning, drawer, battery, water container, and mounting component.
Commercial rooftop-tent guidance generally describes hard-shell tents as emphasizing rapid deployment and a relatively low closed profile, soft-shell tents as offering a larger sleeping footprint, and lightweight wedge designs as attempts to control height and mass. These are vendor-described category tendencies, not universal results; individual products vary (23ZERO commercial rooftop-tent guide).
Mounting a tent over the bed can preserve cargo space beneath it and may keep the installation lower than an above-cab arrangement. Do not assume a specific handling or fuel-use improvement without measurements. Final height and weight placement depend on rack geometry, tent thickness, stored bedding, accessories, and how the tent opens. Added high-mounted mass can influence the completed vehicle’s behavior, so evaluate the loaded truck rather than relying on an unloaded test drive.
A canopy camper can combine secure storage, a sleeping platform, drawers, refrigeration, awnings, lighting, and weather protection. That integration can make frequent camp moves easier, but every subsystem consumes the same vehicle allowance. A permanent camper may also remain on the truck during commuting, carrying expedition equipment on days when none of its features are needed.
The Gladiator’s five-foot bed limits camper selection and makes many full-size slide-ins impractical. Lightweight shells, midsize-specific pop-ups, and integrated canopy systems are more plausible starting points, but exact compatibility, mounting requirements, installed weight, and restrictions must be confirmed for the specific truck and camper. Retailer guidance likewise notes that passengers, water, gear, shell, and camper all draw from the same allowance; because the source sells this equipment, treat its comparisons as commercial guidance rather than independent testing (Gladiator camper configuration overview).
Choose by use case:
- Lightweight weekend traveler: begin with ground camping or a removable rack and modest tent. Keep water, cooking, and recovery equipment compact.
- Daily driver: favor removable modules, a tonneau-compatible arrangement, or a simple topper that does not turn every commute into a fully provisioned expedition.
- Couple moving camp every day: a carefully weight-budgeted canopy or pop-up camper may justify its permanent mass through faster setup, ready bedding, and protected access in poor weather.
- Traveler needing maximum enclosed storage: compare a canopy camper, topper-based system, and bed-replacement architecture, but complete the payload and rear-axle audit before choosing drawers, water tanks, or an exterior kitchen.
There is no universal winner. The right shelter is the lightest complete system that solves the problems your real trips create.
Match tires, gearing, and suspension to the finished load
A lift and 37-inch tires are not the default starting point for a Gladiator overlanding setup. Larger tires may add clearance, but the complete decision also affects tire and wheel mass, gearing, braking feel, spare storage, cost, fitment, and daily behavior.
Use the following comparison checklist rather than treating a nominal tire size as a complete plan:
| Issue | 33-inch direction | 35-inch direction | 37-inch direction |
|---|---|---|---|
| Tire and wheel mass | Usually the most conservative change | Requires a complete wheel-and-tire review | Demands the greatest scrutiny of added rotating mass |
| Clearance | Verify for route and stock geometry | Check full steering lock and compression | Detailed fitment review is essential |
| Wheel offset | Avoid interference and excessive protrusion | Confirm with the exact wheel and tire | Especially sensitive to complete geometry |
| Articulation | Check contact through usable travel | Inspect liners, fenders, and suspension | Verify through steering and suspension travel |
| Spare fitment | Confirm location and access | Check the under-bed position or alternative | May require a revised spare plan |
| Gearing | Evaluate with engine, transmission, and load | Reassess loaded drivability | Regearing may become a larger part of the plan |
| Braking | Check condition and loaded feel | Review the complete combination | Professional compatibility review is prudent |
| Fuel use | Establish a baseline | Expect the complete system to matter | Do not buy on unsupported economy claims |
| Cost | Often the lowest supporting-modification burden | A middle path for some owners | May trigger wheel, lift, gearing, and spare changes |
| Daily driving | Most conservative | Often chosen as a compromise | Requires the greatest tolerance for system changes |
Doug Stokes’ Mojave provides one moderate owner-reported example. He said that 35-inch tires fit his particular truck without required adjustments, including the spare, with possible slight fender-liner contact at extreme articulation. That does not establish fitment for another Gladiator with different wheels, suspension, trim, load, or model year (Doug Stokes’ Mojave build overview).
Documented 37-inch builds often use approximately two to three inches of front lift, but that pattern is not a fitment rule. Fender shape, wheel width and offset, spring height under load, bump-stop arrangement, steering clearance, articulation, and spare location all matter. A truck that clears a tire while parked may still make contact at steering lock or suspension compression.
Gearing is equally configuration-specific. The GP-Factor Rubicon owner changed from 4.10 to 4.88 after combining 37-inch tires with camper weight. That was the owner’s response to one engine, transmission, axle, tire, and load combination—not a universal ratio recommendation. The same build used 2.5-inch front springs and 3.5-inch rear springs to support the camper, with adjustable shocks intended to accommodate loaded and empty use (GP-Factor Gladiator build profile).
Choose suspension only after estimating or measuring the constant load. Evaluate:
- Spring support: whether ride height and usable travel remain appropriate under the permanent load.
- Compression damping: how the shock controls compression and impacts.
- Rebound damping: how it controls the spring as the suspension extends.
- Sway control: the balance between body control and desired articulation.
- Bump-stop use: whether the loaded vehicle repeatedly consumes its available travel.
- Empty-versus-loaded behavior: especially important when removable equipment creates two very different operating states.
Spring support and shock control are separate. In the Overland Journal build, Matt Scott reportedly considered the spring rate suitable for his load but found the rear shocks inadequately damped in compression and rebound for that particular configuration. A truck can therefore sit at an acceptable height and still move poorly over repeated uneven surfaces (Overland Journal suspension discussion).
Have a qualified installer verify tire, wheel, brake, gearing, and suspension compatibility for the exact model year and completed configuration. A “best kit” named without the final load, wheel specifications, tire, and intended terrain is not a meaningful recommendation.
Add recovery and protection without spending the payload twice
Organize trail upgrades by consequence rather than appearance.
Vehicle recovery can include a winch where justified, recovery points, compatible rigging, traction boards, and equipment suited to the routes and vehicles in the group.
Tire management can include an appropriate spare, repair equipment, pressure monitoring, and an air compressor when airing down or remote puncture management makes it useful.
Underbody and side protection can include sliders, skid protection, and bumpers selected for the obstacles actually encountered.
Lighting should solve a defined need while accounting for electrical demand, mounting, visibility, and aim.
Extended range may involve additional fuel or water when route remoteness and dependable resupply make it necessary.
Winches, compressors, traction boards, sliders, bumpers, and recovery kits recur in documented Gladiator builds, but recurrence is not proof that every traveler needs every item. Someone using maintained forest roads may benefit more from appropriate tires, a repair plan, basic recovery equipment, communication, and careful route planning than from duplicate winches or full replacement armor.
Expedition Overland’s 2020 Rubicon, Odin, illustrates the elaborate end of the spectrum. Its showcase lists a tray system, long-range fuel tank, 37-inch tires, upgraded suspension, dual winches, solar, and an air compressor. It was built for overlanding and on-road production work, so it should be treated as a specialized recovery- and range-oriented build rather than a standard template (Expedition Overland Odin showcase).
Contrast that with the modular Mojave approach: one winch, replacement bumpers, sliders, a removable rack, and trip-specific cargo. The modular approach still needs a complete weight calculation, but it demonstrates that adventure equipment does not all have to remain installed.
Count bumpers, winches, armor, mounting plates, tools, rigging, traction boards, and auxiliary fuel in both the total-weight and axle-loading plans. Front protection consumes capacity at one end; drawers, spare fuel, water, tools, and recovery boxes can concentrate it at the other.
More fuel or water extends self-sufficiency but also reduces the margin available for occupants and other equipment. Carrying quantity should follow route planning: distance between dependable supplies, expected delays, weather, and realistic consumption. Maximum theoretical range is not automatically useful when reliable resupply is available.
Before using recovery equipment, consult the instructions for the truck, mounting system, winch, rigging, and recovery components. Confirm that the attachment points and components are intended to work together. A photograph of another truck does not establish compatibility or an acceptable recovery method for yours.
Plan water, power, food, and storage as one system
A multi-day setup is a connected system. It may include:
- Drinking, cooking, and washing water
- Food and cooking equipment
- Refrigeration or insulated food storage
- Camp and task lighting
- Device charging
- Ventilation or heat where conditions warrant it
- Secure storage and cargo restraint
- Communications
- First aid and personal medication
- Vehicle tools and repair supplies
- Emergency food, water, shelter, and navigation
Plan electrical capacity from demand rather than panel size. List each electrical load, its power draw, expected operating time, and daily energy demand. Include refrigeration, lighting, phones, cameras, computers, fans, communication equipment, pumps, and any heater controls. Then consider battery capacity, charging sources, reserve, shade, season, temperature, and consecutive low-production days.
The GP-Factor profile provides a useful but narrow owner case study. That system used two nominal 126-watt solar panels, a controller, monitoring and switching equipment, the stock vehicle battery, a 47-liter refrigerator, LED lights, and device charging. The owner reported nine months without a battery problem under that use pattern. The same build profile documents an 11-pound propane tank intended to supply a stove and heater. Neither the electrical result nor the photographed propane arrangement establishes suitability for another climate, battery, appliance, installation, shade level, season, or collection of loads; obtain and follow the applicable equipment and camper instructions (GP-Factor electrical and camp-system profile).
A dual-battery system, portable power station, or starting-battery arrangement should follow the load calculation and the consequences of losing power. Determine which battery must remain able to start the engine, how charging will work in poor conditions, and whether critical camp loads need isolation or backup. Do not assume that a successful owner installation transfers to a different battery condition or usage pattern.
Cooking and heating equipment introduce equipment-specific requirements. Use the appliance, fuel-system, and camper manufacturers’ instructions for installation, storage, ventilation, clearances, and operation. A build profile or parts list is not a substitute for those manuals.
Ordinary camp systems can consume the available allowance quickly. The overloaded owner account discussed earlier included supplies for five days, water, tools, a compressor, recovery gear, auxiliary fuel, cooking equipment, and traction boards. None was remarkable in isolation; the combined load was the problem.
Favor compact equipment that solves more than one need, and remove duplicates. Store heavy items low and restrain them against movement. Keep recovery equipment accessible without unloading the entire bed, but do not let “easy access” turn the tailgate area into an unchecked concentration of mass.
Before departure, confirm:
- Water quantity matches the route and the containers are restrained.
- Food and refrigeration plans match the trip duration.
- Batteries are charged and the expected daily energy balance has been reviewed.
- Solar panels, cables, fuses, and connectors are mounted and protected as their instructions require.
- Cooking and heating equipment is stored and operated according to its documentation.
- Applicable ventilation requirements are understood.
- Drawers, cases, refrigerators, batteries, and water containers cannot become loose cargo.
- Communications and emergency equipment are charged and accessible.
- Consumables have been included in the payload worksheet.
- Total and axle-specific margins remain after everyone and everything are aboard.
Build in stages and verify every interface
- Take simple trips in the existing vehicle.
- Record unmet needs.
- Establish total-weight and rear-axle budgets.
- Address suitable tires, basic recovery, and route-relevant protection.
- Choose the shelter and storage architecture.
- Weigh the completed fixed configuration.
- Select or finalize suspension for the measured travel load.
- Add electrical and comfort systems only where demand justifies them.
- Weigh the fully provisioned truck.
- Conduct a loaded shakedown close to services.
For a rack-and-tent build, choose the tent style first—or evaluate the rack and tent as one package. Confirm:
- Opening direction
- Mounting width
- Minimum and maximum crossbar spacing
- Cab overhang
- Rack height
- Closed and open clearances
- Tonneau interaction
- Tailgate and bed access
- Ladder position
- Fastener and bracket requirements
- Dynamic, static, and off-road ratings
Static capacity applies while parked. It does not by itself establish adequate capacity while driving or suitability for repeated off-road loads. Confirm each rating and any off-pavement restrictions with the relevant rack and tent manufacturers.
A JeepGladiatorForum discussion demonstrates why interface checks must happen before purchase. After buying a rack and tent, the buyer identified a possible conflict between the tent’s stated 68-inch minimum crossbar distance and a reported rack spacing of 45 inches. The supplied discussion did not resolve the discrepancy, so it is a warning about verification—not evidence that the combination is compatible (Gladiator rack-and-tent fitment discussion).
After installation, audit every interface against the relevant instructions:
- Fasteners are installed and torqued as specified.
- Rack, camper, and tent mounts use the intended attachment points.
- Brake lights remain visible.
- Wiring is fused, supported, and protected from abrasion and heat.
- Openings and penetrations are sealed as intended.
- Tires clear suspension, fenders, liners, and bodywork through steering and usable travel.
- The spare remains accessible.
- Tailgate, doors, drawers, first aid, and emergency equipment can be reached.
- Water, fuel, batteries, refrigerators, and tools are restrained.
- Headlight and auxiliary-light aim are checked under travel load.
Take the fully loaded truck on a shakedown trip near fuel, repair facilities, and an easy exit. Include highway, secondary-road, and representative rough-road sections without immediately committing to remote travel. Recheck fasteners, cargo movement, leaks, tire contact, temperatures, braking feel, steering response, and suspension control. Weigh the truck again if supplies or equipment change.
The final go/no-go review should confirm:
- Total weight is within the applicable official limit.
- Front and rear axle readings are within their corresponding limits.
- Tires and wheels are suitable for their measured loads.
- Rack, camper, and tent ratings cover the intended use.
- Every component is mounted according to its instructions.
- Braking and steering remain controlled under the travel load.
- Tire clearance has been checked through steering and suspension movement.
- Required lighting remains visible and correctly aimed.
- The spare, recovery equipment, first aid, and communications are accessible.
- Nothing essential depends on an unresolved mounting or electrical interface.
Can a Jeep Gladiator carry a canopy camper or truck camper?
Yes, certain canopy campers, shells, toppers, and midsize-specific systems may be suitable, provided the complete installation fits the truck and remains within the limits of that individual vehicle.
Count more than the camper itself. Occupants, mounting hardware, awnings, drawers, batteries, water, fuel, food, refrigeration, and personal equipment all consume the same allowance. Confirm model-year fitment, installed mass, mounting method, total weight, axle loading, and any dynamic or off-road restrictions before purchase.
Is a Rubicon, Mojave, or Sport Max Tow better for overlanding?
It depends on the trip. A Rubicon is a logical starting point when factory technical-trail hardware is central to the plan. A Mojave may suit desert-oriented travel, particular ride preferences, and moderate trail use. A Sport Max Tow deserves investigation when carrying capacity and value matter more than maximum factory trail equipment.
Do not decide by trim reputation alone. Compare current specifications and inspect the individual truck’s labels because model year, powertrain, options, and installed equipment affect the finished result.
Do 37-inch tires require 4.88 gearing on a Gladiator?
No universal ratio follows from tire diameter alone. The owner example discussed above was a configuration-specific response to a particular camper, tire, axle, engine, and transmission combination.
Evaluate actual tire dimensions and mass, travel load, terrain, elevation, towing use, and desired road behavior. Review braking, wheel offset, clearance, articulation, spare fitment, and suspension alongside gearing.
Should I choose the rooftop tent or the bed rack first?
Choose the tent style first or select both as a verified system. The tent determines opening direction, mounting width, crossbar-spacing requirements, cab overhang, ladder position, and often the appropriate rack height.
Before ordering, obtain written specifications from both manufacturers. Confirm mounting dimensions, dynamic and static ratings, off-road restrictions, tonneau compatibility, tailgate access, occupied capacity, and open-tent clearance. Two products marketed for the Gladiator are not automatically compatible with each other.
Does a Gladiator overlanding setup need a dual-battery system?
Not automatically. The decision should follow calculated electrical demand, charging opportunities, reserve requirements, and the consequences of discharging the battery used to start the truck.
List each load and its daily operating time, then assess battery capacity and charging under realistic shade, weather, and seasonal conditions. A setup limited to occasional lighting and device charging presents a different demand profile from one operating continuous refrigeration, ventilation, communications, computers, pumps, or heater controls.
A payload-first Gladiator is not the least adventurous build. It is the one designed to complete the trip. Define the route, select the lightest shelter and equipment that solve real needs, verify every rating and mounting interface, weigh the travel-ready truck, and tune the suspension only after the final load is understood.