
Keep Your Trailer Level on Long Drives: Adjustable Drop Hitch Basics and Setup
Receiver height minus level coupler height gives the required drop. See why travel load, ratings and ground clearance can change the right choice.
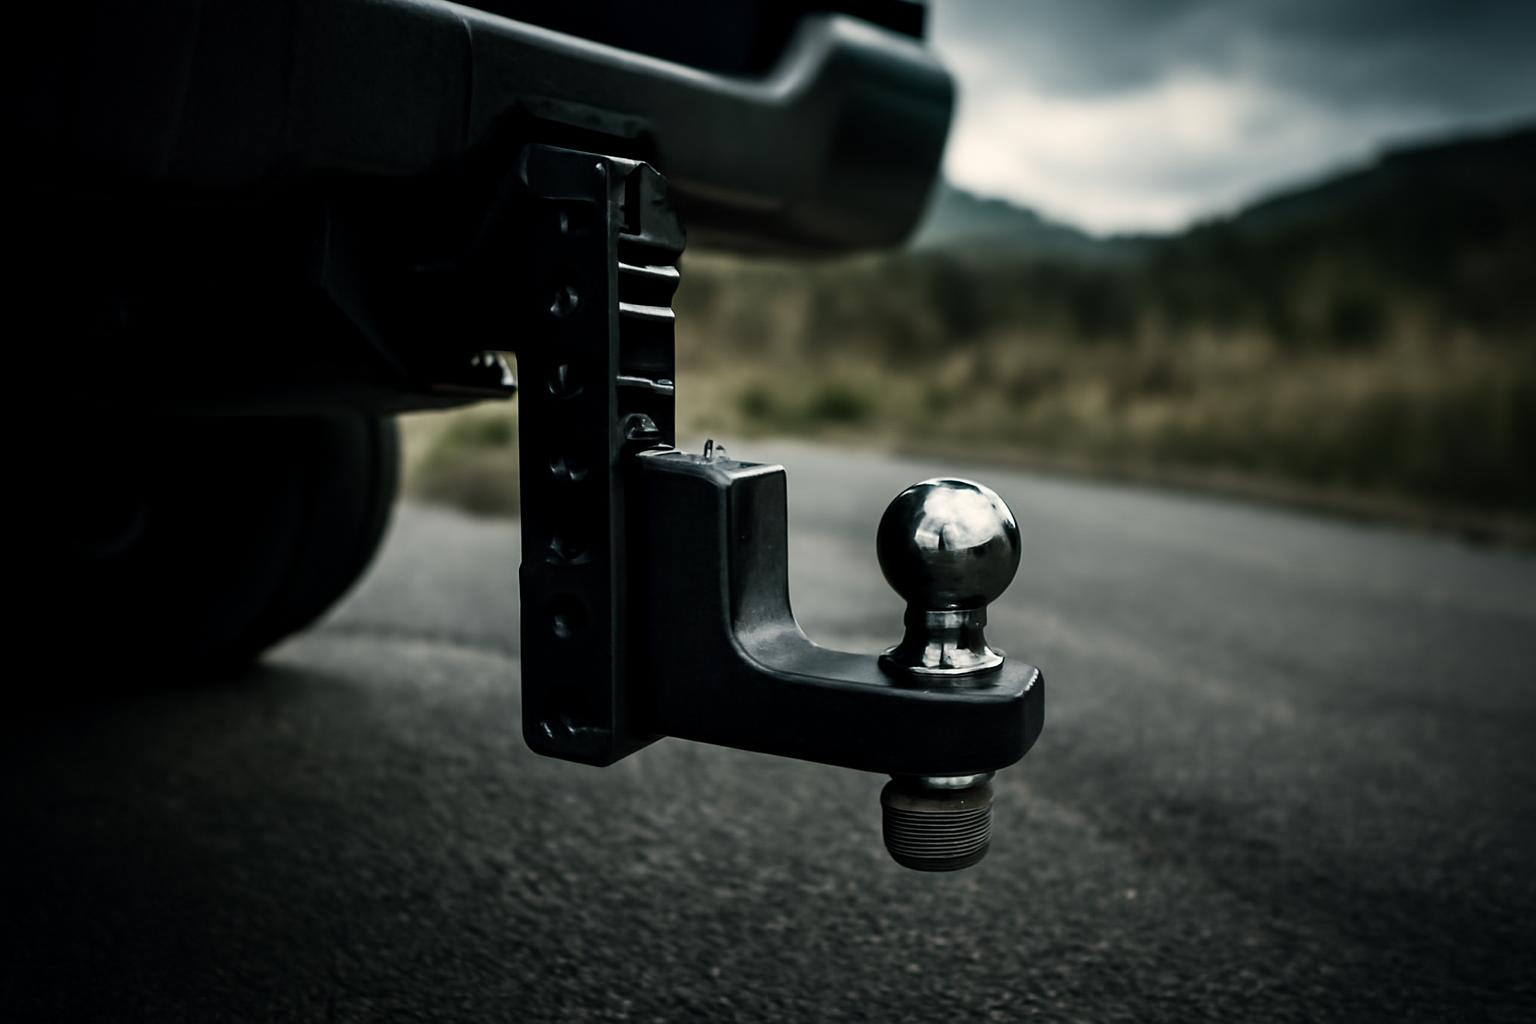
An adjustable drop hitch is not glamorous gear, but it solves a very practical towing problem: getting the trailer coupler and the tow vehicle’s receiver to meet at the right height so the trailer sits as close to level as possible.
That matters more on long drives than quick local errands.
For road trippers, the appeal is simple. If you tow more than one trailer, switch between lightly loaded and trip-loaded setups, or use a taller SUV, van, or lifted truck, a fixed ball mount can be too limiting. An adjustable drop hitch gives you a way to move the ball height up or down without buying a separate mount for every combination you tow.
This guide stays practical and brand-neutral. It covers what an adjustable drop hitch is, when it makes sense, how to measure for the right drop or rise, what specs commonly show up in current examples, how to install and adjust one, and how hitch setup fits into a broader pre-trip towing check.
What Is an Adjustable Drop Hitch?
An adjustable drop hitch is a ball mount with a vertically adjustable section. Instead of one fixed ball height, it lets you move the ball platform up or down using a channel, stacked holes, and removable pins. In practice, that means one hitch can provide drop when the receiver sits higher than the trailer coupler, or rise when the receiver sits lower.
That is the main difference from a fixed ball mount. A fixed mount is simple, usually cheaper, and perfectly fine when you always tow the same trailer with the same vehicle at the same ride height. An adjustable drop hitch trades some of that simplicity for flexibility. If your trailer lineup changes, your load changes, or your tow vehicle sits unusually high, adjustability becomes useful.
The tradeoffs are straightforward too. Adjustable hitches are usually bulkier, heavier, and more expensive than fixed mounts. They also give you more setup decisions to make, which means you need to measure instead of guessing.
The common parts are easy to recognize once you know the layout:
- the shank that slides into the receiver
- the vertical channel or stacked adjustment section
- the ball platform or tongue that carries the hitch ball
- the pins that secure the receiver connection and the height setting
Dual-ball setups are common, often pairing a 2-inch ball with a 2-5/16-inch ball so one hitch can cover many utility, boat, and camper couplers.
For most road-trip users, the key idea is not the hardware itself. It is the function: one adjustable drop hitch can replace a small pile of separate fixed ball mounts when your towing setups vary.
Why Consider One for Road Trip Towing?
The point of an adjustable drop hitch is not magic handling improvement. It is simpler than that: it helps match the ball height to the trailer you are actually towing so the trailer frame can sit closer to parallel with the road.
That becomes most useful for three kinds of drivers:
- people towing with taller or lifted vehicles
- people swapping between different trailers
- people loading the same trailer differently from trip to trip
Trailer Valet’s height-adjustment guide says a hitch set too low can put excess weight on the tow vehicle’s rear axle, while a hitch set too high can stress the trailer axle, which is why getting the ball height right matters before a long drive begins (Trailer Valet).
It is especially useful when the receiver on the tow vehicle sits notably higher than the trailer coupler.
Scenic routes add a planning layer. On the Blue Ridge Parkway, Road Listings notes a 469-mile route with a 45 mph limit, no fuel on the parkway itself, and some tunnels with 12-foot clearance limits. If you are already managing trailer height, route restrictions, and slower technical driving, eliminating a bad hitch-height mismatch is one less variable to carry into the trip.
An adjustable hitch does not turn a poor towing combination into a good one, and it does not replace braking equipment, weight-distribution hardware, or vehicle and trailer ratings. What it does do is make it easier to set the ball height correctly for the trailer, load, and tow vehicle you are using that day.
How to Measure Your Required Drop or Rise
This is the part that matters most. You do not choose an adjustable drop hitch by guessing from a lift-kit size, truck model, or what worked for someone else. You measure your own tow vehicle and your own trailer.
The standard method is:
receiver height - level coupler height = required drop
If the result is negative, you need rise instead of drop. GEN-Y’s setup guide describes the same basic process: measure from the ground to the inside top of the receiver opening on the tow vehicle, then measure from the ground to the bottom of the coupler while the trailer is level (GEN-Y).
Here is a driveway-friendly way to do it:
-
Park the tow vehicle on level ground. A sloped surface can throw the numbers off enough to matter.
-
Measure the receiver height. Measure from the ground to the inside top edge of the receiver opening.
-
Level the trailer. Use the trailer jack until the trailer frame appears parallel to the ground. A small level helps.
-
Measure the coupler height. Measure from the ground to the bottom of the coupler.
-
Subtract coupler height from receiver height. Positive result = drop needed. Negative result = rise needed.
-
Choose the nearest usable adjustment position. Then hook up and recheck visually on flat ground.
The most important refinement is this: measure the trailer in travel trim, not empty months ahead of the trip. Proven Industries’ hitch-height guide specifically recommends measuring the loaded trailer coupler and loaded truck receiver on a level surface, and it also recommends logging the correct pin position once you find it (Proven Industries).
That matters because load changes real numbers. Full water tanks, batteries, coolers, firewood, passengers, bed cargo, and normal rear suspension squat can all change the final relationship between receiver and coupler height.
A few practical habits make setup much easier:
-
Aim for level, not mathematical perfection. Most adjustable hitches move in hole increments, so you are often choosing the closest setting rather than an exact fraction.
-
Measure after the travel load is packed. Empty-trailer measurements can be misleading.
-
Write the pin position down. “Third hole from the top” is more useful next month than trying to remember by eye.
-
Recheck after hookup. Once the coupler is on the ball and the jack is fully raised, look again.
If you are between two settings, do not rationalize. Recheck on flat ground, confirm all ratings, and choose the position that leaves the trailer closest to level when fully coupled.
Common Specs and Features in Adjustable Drop Hitches
The adjustable drop hitch market is broad, but a few patterns repeat.
In current published examples, 2-inch shanks dominate the everyday market, while 2.5-inch and 3-inch versions appear as capacities rise. Weigh Safe’s aluminum adjustable hitch line, for example, is offered with 2-inch, 2.5-inch, and 3-inch shanks and 4-, 6-, 8-, and 10-inch drops. The company lists maximum GTW of 7,500 to 12,500 pounds for its 2-inch versions, 18,500 pounds for 2.5-inch, and 21,000 pounds for 3-inch, with tongue-weight ratings of 1,500 pounds on 2-inch models and 2,200 pounds on 2.5-inch and 3-inch versions (Weigh Safe).
CURT’s current adjustable listings show how the middle of the market is structured: mostly 2-inch-shank adjustable mounts, channel-style mounts, and aluminum dual-ball models, with published drops including 6 inches, 9-1/2 inches, and deep-drop options up to 10 inches. In the examples shown on its catalog page, capacities reach 14,000 to 15,000 pounds depending on the specific mount and attachment style (CURT).
GEN-Y lists a 2-inch-shank adjustable model with a 5-inch to 17.5-inch drop/raise range, 16,000-pound towing capacity, and 2,000-pound tongue-weight rating. That is a useful reminder that “adjustable drop hitch” can describe everything from a mainstream SUV ball mount to a much larger heavy-duty setup (GEN-Y).
Across the category, the features you see most often include:
- dual balls, usually 2-inch and 2-5/16-inch
- multiple pin positions in 1-inch or 2-inch increments
- powder-coated steel or machined aluminum construction
- lock-ready or locking-pin options on some models
- anti-rattle features on some channel-style hitches
- specialty extras, such as built-in tongue-weight gauges on a small number of products
The big shopping mistake is focusing on drop size alone. The number of inches is only one spec. You still need to verify the rating of the hitch, the ball, the receiver, and the trailer, because those limits do not all rise together.
Market Examples of Adjustable Drop Hitches
Looking at real market examples helps make the category less abstract, as long as you treat product pages as examples rather than endorsements.
Rhino USA sits in the mainstream 2-inch receiver space. Its published product details support compatibility with 2-inch receivers, inclusion of 2-inch and 2-5/16-inch screw-in balls, and two locking pins keyed alike. That makes it a straightforward example of the everyday dual-ball adjustable format without leaning on image-only capacity claims (Rhino USA).
Weigh Safe represents a more feature-heavy aluminum approach. In addition to the 4- to 10-inch drop options and 2-inch to 3-inch shanks already noted above, the standout feature is its built-in glycerin-filled tongue-weight gauge. Locks are presented as an extra-cost option rather than a standard inclusion on every configuration.
GEN-Y is a good example of the deeper-drop steel category. Its 2-inch-shank 16K model, with 5 to 17.5 inches of adjustment and dual-ball capability, illustrates how adjustable hitches can move beyond the common 4- to 10-inch band when taller vehicles or unusual trailer combinations demand it.
At the heavier-duty end, BulletProof Hitches lists a 2.5-inch-shank, 10-inch drop/rise model with 22,000-pound max towing capacity, 3,000-pound tongue weight, and six ride-height positions. That is a different class of hitch from a typical 2-inch receiver product, and it shows how quickly weight, size, and cost tend to rise with capacity (BulletProof Hitches).
CURT rounds out the middle of the market with channel-style adjustable mounts and lighter aluminum variants. The published lineup shows the category’s variety: some products stay close to a conventional dual-ball setup, while others swap in hooks, steps, pintle-style attachments, or other channel-mounted accessories.
The takeaway from these examples is not that one is “best.” It is that the market breaks into clear tiers:
- Everyday 2-inch receiver models for common campers, boats, and utility trailers
- Feature-focused models with extras like gauges or lock options
- Deep-drop or heavy-duty models for taller trucks and bigger trailers
- Channel-style systems that trade compactness for flexibility
When comparing models, start with the hard fit items first: receiver size, required drop, ball size, GTW, tongue-weight rating, and whether the hitch remains rated the same way in every position you plan to use.
Installation and Adjustment Steps
Installing an adjustable drop hitch is usually simple, but simple does not mean casual.
Start with the tow vehicle on level ground. Insert the shank into the receiver, line up the holes, and secure it with the specified receiver pin and retainer or lock. Then set the ball platform to the height you already measured for, install the adjustment pins fully, couple the trailer, raise the jack completely, and verify that the trailer still sits level on flat ground. Trailer Valet’s installation guide also recommends checking for play between the hitch and receiver and recording the correct hole position for repeat setups.
A practical sequence looks like this:
- Insert the shank and secure the receiver pin.
- Set the ball platform to the measured drop or rise position.
- Install the adjustment pins fully and secure their clips or locks.
- Back the tow vehicle to the trailer and lower the coupler onto the ball.
- Latch the coupler and install the coupler pin or lock.
- Raise the jack fully and check that the trailer sits level on flat ground.
- Check for excess play or looseness before departure.
Many adjustable hitches can be flipped or reoriented to provide rise instead of drop, but you should not assume that physical fit means identical ratings in every orientation. Retailer guidance on adjustable drop hitches notes that rise use is common, but the exact rating and use limits still need to be confirmed for the specific hitch and position you plan to tow in (Ron’s Toy Shop).
If you tow more than one trailer, the fastest long-term habit is to keep a note for each one with:
- ball size
- pin-hole position
- any loading note that changes height, such as “level only when water tank is full”
That turns setup from memory work into a repeatable process.
Vehicle Prep and Route Considerations
An adjustable drop hitch is only one part of towing prep.
For the vehicle itself, the basic pre-trip checklist still matters: check cold tire pressure, tread depth, engine oil, coolant, washer fluid, and battery condition. Road Listings also recommends carrying a tire inflator, jumper cables or a jump starter, a flashlight, reflective triangles or flares, and a basic tool kit for longer drives (Road Listings tire and gear checklist).
Then add route-specific planning. On US-93 from Las Vegas to Twin Falls, Road Listings describes a 540-mile run with key fuel stops at Searchlight, Caliente, Ely, Wells, and Twin Falls, including an 80-mile no-services stretch between Caliente and Ely. That matters more when towing because fuel economy usually drops and roadside improvisation gets harder.
For towing setup specifically, keep three checks in mind before departure.
First, verify all ratings. The usable limit is the lowest-rated component in the chain: vehicle, receiver, hitch, ball, coupler, trailer, tires, and any weight-distribution hardware.
Second, check tongue weight. Proven Industries’ towing-height guide gives the commonly cited target of about 10% to 15% of total trailer weight, while also stressing that your own trailer and hitch documentation remain the controlling reference.
Third, think about ground clearance. A deep-drop hitch solves one problem by hanging lower, which can create another at steep fuel-station entrances, ferry ramps, campground dips, and rough shoulders.
A hitch that levels the trailer correctly does not change overall trailer height, tunnel limits, trailer restrictions, or no-fuel stretches. It simply removes one avoidable setup mismatch from the trip.
Steel vs Aluminum and Other Tradeoffs
Material matters, but it is not a simple good-better-best ranking.
In the reviewed examples, aluminum hitches tend to emphasize lighter handling weight and corrosion resistance, while several of the higher-capacity models are steel. That lines up with how many buyers experience the category in practice: aluminum is attractive when you remove the hitch often, store it in the vehicle, or simply do not want to wrestle a very heavy mount in and out of the receiver.
Steel, by contrast, is common in the bigger deep-drop and heavy-duty examples. The tradeoff is everyday handling. A heavier steel hitch may be ideal once installed but less pleasant to remove, carry, or store.
The same kind of tradeoff applies to adjustable versus fixed hitches:
- choose adjustable when you tow different trailers, different tow vehicles, or changing loads
- choose fixed when you have one stable setup and want the simplest, lightest, and least expensive solution
For many road trippers, the real question is not just material. It is ownership friction. If a hitch is so heavy or awkward that you hate handling it, that affects day-to-day use just as much as the spec sheet does.
FAQ
Do adjustable drop hitches work with lifted trucks?
Yes. The reliable method is still measurement, not lift-based guesswork: compare the receiver height and the level coupler height, then choose the drop that leaves the trailer closest to level when fully loaded and coupled.
Can they provide rise instead of drop?
Often, yes. Many adjustable drop hitches can be configured for rise as well as drop, but the important part is confirming the rating and allowed use in that orientation before towing.
What if measurements change with load?
That is normal. Cargo placement, passengers, full water tanks, bed gear, and suspension squat can all change the final relationship between receiver and coupler height. That is why measuring an empty trailer in storage can mislead you. The practical fix is to measure the setup in the condition you actually travel in, then keep notes on the correct pin position for that loaded combination.
Are locking pins standard?
No. Treat locking hardware as a model-specific feature, not a category-wide standard. For example, Rhino USA’s published product details include two locking pins keyed alike, but that does not mean every adjustable hitch does.
How often to recheck setup?
At minimum, recheck whenever the trailer, tow vehicle, or travel load changes. It is also smart to confirm the setup after hookup on flat ground and to keep an eye on pins, latch position, and looseness during normal trip stops. Trailer Valet’s guide specifically emphasizes confirming secure pins, checking for play, and recording the correct setup position so repeat hookups stay consistent.
An adjustable drop hitch is not complicated once you approach it methodically. Measure on level ground, use the trailer in its real loaded condition, choose a hitch that matches your receiver and ratings, and verify the final setup after hookup. On longer routes, that extra care pays off because long miles magnify small mistakes.