
How to Plan an Express Van That Works on the Road
With about 50 inches of stock cargo height, most adults cannot stand inside. Roof choice, payload, axle loads and total cost determine what will fit.
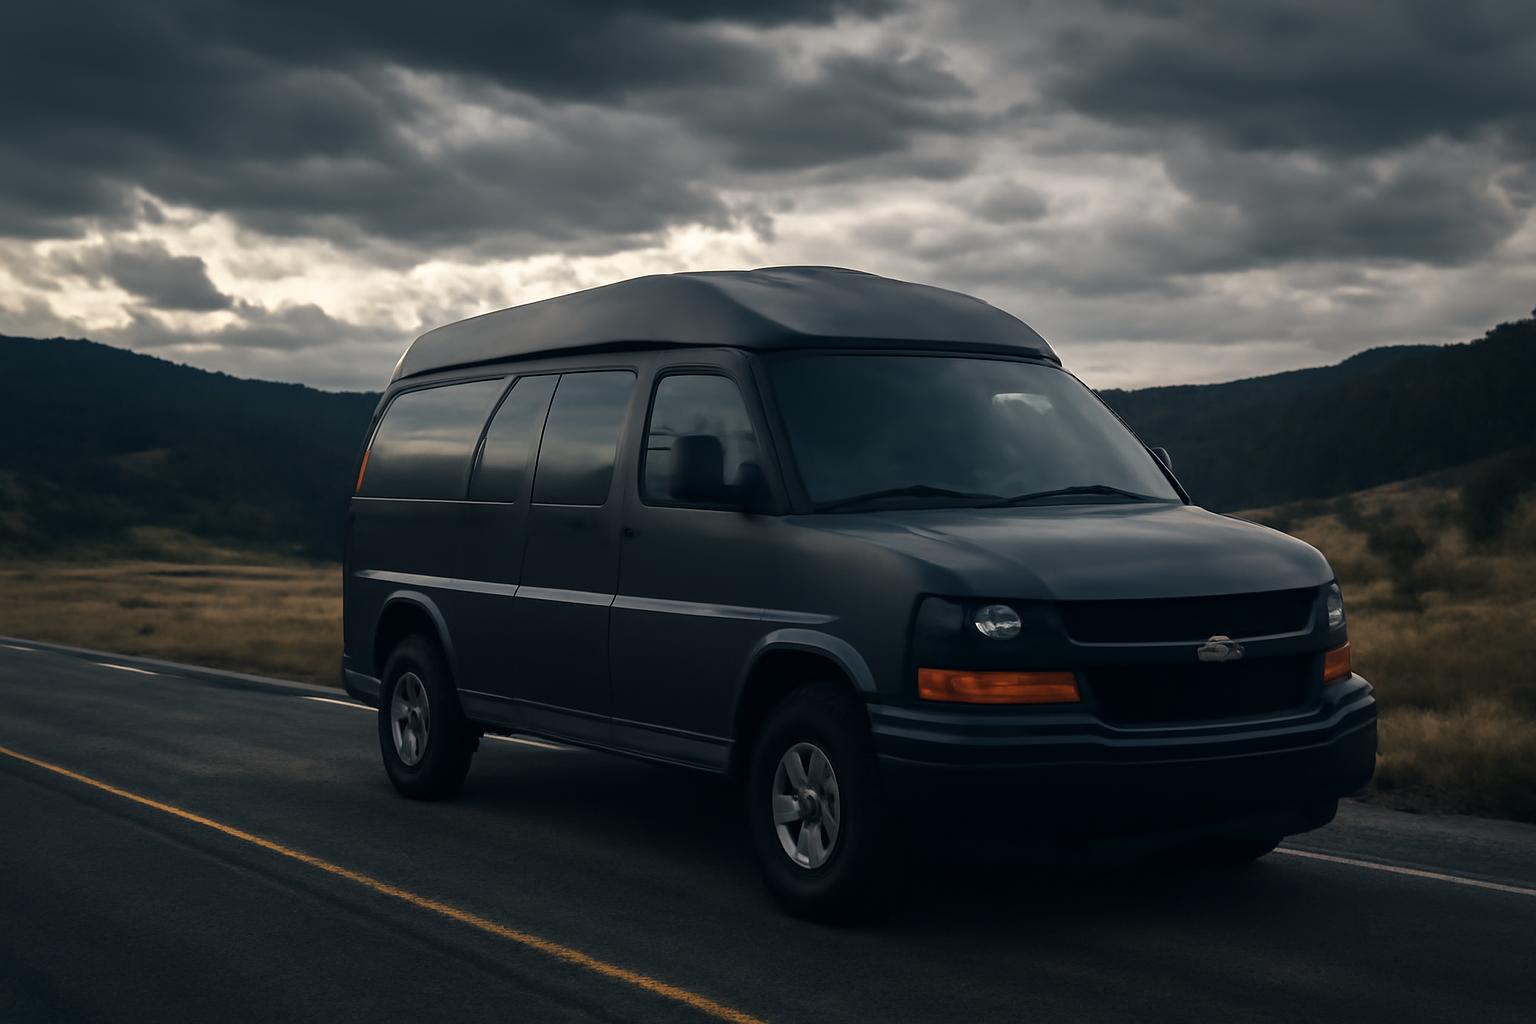
A successful Chevy Express conversion begins with the trips the van must support—not with cabinets, batteries, or appliances. A weekend sleeper, remote-work camper, family travel van, commercial upfit, and tow vehicle may share the same badge while requiring very different layouts, equipment, and weight margins.
Before buying a van or kit, define how many people must ride and sleep inside, where the vehicle must fit, what it must carry, and how long it must operate away from services. Then verify the individual van’s dimensions and ratings, mock up the interior, estimate completed weight and electrical demand, and price the entire project rather than its most visible components.
This is a planning and purchasing guide, not an engineering manual or a substitute for vehicle-specific, electrical, structural, fuel-system, restraint, insurance, or legal advice. Safety-sensitive work should be evaluated against the documentation and rules applicable to the exact vehicle and jurisdiction.
First Decide What “Conversion” Means for Your Trip
“Chevy Express conversion” can describe four substantially different vehicles:
- Camper: Built primarily for sleeping, storage, cooking, and independent travel.
- Luxury passenger van: Arranged to carry a family, group, or business passengers in greater comfort.
- Commercial work upfit: Equipped with partitions, shelves, drawers, racks, secure storage, or specialized equipment.
- Mixed-use van: A camper that also carries passengers, supports remote work, transports equipment, or tows a trailer.
Passenger-oriented conversions commonly include captain’s chairs, a rear sofa bed, entertainment equipment, charging ports, interior lighting, privacy glass, shades, and upgraded trim. Some professionally converted Express vans are advertised for seven to nine occupants, depending on configuration and equipment. Arbogast Van Depot describes representative passenger-conversion features and seating configurations.
A camper reverses those priorities. It needs a practical bed, ventilation, privacy, gear storage, and an interior that remains usable with the doors closed. More elaborate builds may add refrigeration, water, heating, cooking equipment, a toilet, and a house electrical system.
A commercial upfit should start with workflow. List the tools, materials, parts, or documents that must be carried; determine which items require quick access; and decide whether a partition, floor drawers, wall shelving, or roof storage is appropriate. Heavy tools and dense materials can consume capacity quickly, while badly positioned shelving can obstruct doors or concentrate weight on one side. A trade upfitter may be the better path when the van needs specialized mounts, partitions, exterior racks, or equipment integration.
Scope should follow the trip:
- Occasional weekend sleeping: A bed, basic storage, privacy covers, ventilation, and portable lighting may be enough.
- Remote work: Add a usable table, supportive seated position, device charging, task lighting, and an electrical plan based on actual working hours.
- Family travel: Prioritize verified passenger positions, occupant access, luggage space, climate comfort, and containment of loose equipment.
- Full-time or off-grid travel: Expect greater demands from water, refrigeration, batteries, heating, food, and all-season clothing.
- Commercial work: Design storage around inventory, access frequency, security, and the weight and shape of tools or materials.
- Work and recreation: Use removable or isolated storage so dirty tools and materials do not obstruct or contaminate the sleeping area.
- Camper and tow vehicle: Treat conversion weight, occupants, cargo, hitch equipment, and trailer tongue weight as one loading problem.
Do not assume a couch, side bench, bed, or swiveling chair can be used as a travel seat. Parked-use furniture and travel seating are separate design questions. Before altering or adding seats, belts, or child-restraint positions, verify the proposed installation with qualified parties and the authorities or insurers that govern the vehicle.
| Intended use | Likely occupants | Essential features | Main weight pressure | Most relevant path |
|---|---|---|---|---|
| Weekend camper | One or two | Bed, ventilation, privacy, simple storage | Bed platform and trip gear | Basic DIY or simple kit |
| Remote-work camper | One or two | Bed, desk, charging, lighting, connectivity | Batteries and work equipment | DIY, configurable kit, or custom build |
| Full-time or off-grid camper | One or two | Water, refrigeration, heat, storage, robust power | Water, batteries, cabinetry, appliances | Detailed DIY or professional build |
| Luxury travel van | Configuration-dependent | Verified seating, charging, entertainment, privacy | Occupants, seats, luggage, raised roof | Completed professional conversion |
| Commercial upfit | Job-dependent | Shelving, partition, drawers, racks, equipment mounts | Tools, materials, roof and hitch loads | Trade upfitter |
| Mixed camper and tow vehicle | Trip-dependent | Verified seats, bed, cargo access, towing equipment | Conversion, cargo, and tongue weight | Weight-led custom plan |
Write a one-sentence mission before shopping:
This van must carry four people in verified travel positions, sleep two, fit in our garage, tow our trailer, and support three nights without shore power.
That sentence gives every later purchase a test. If a cabinet, appliance, seat, or roof modification does not help the mission—or consumes too much space, weight, or money—it can be deferred.
Choose the Van by Configuration and Capacity, Not the Badge Alone
The first choice is often cargo van versus passenger van.
A cargo van provides a relatively blank shell. It is a logical starting point for a two-person camper, mobile workshop, or trade upfit.
A passenger van may already have windows, trim, climate components, seats, restraints, and floor hardware. Those features can be useful if the finished van still needs several original passenger positions.
Neither starting point is automatically better. Choose the body that preserves the factory features the finished vehicle actually needs.
Length is the next decision. Sportsmobile’s Express guide identifies 135-inch and 155-inch wheelbases, with the extended version adding approximately two feet of interior length. The same seller guide describes the Express as a body-on-frame, front-engine, rear-wheel-drive platform with limited factory roof height. These are general configuration descriptions; the candidate van still needs vehicle-specific verification. Sportsmobile summarizes the wheelbase, body, roof, and drivetrain characteristics.
Extra length can create room for a fixed bed, deeper kitchen, longer aisle, additional shelving, or rear equipment storage. It also increases the parking footprint and makes it easier to add more furniture and cargo than the original plan allowed. Treat the extra space as circulation and access—not permission to fill every inch.
The 2500-versus-3500 decision should follow a completed-weight estimate:
- A light weekend conversion may fit within the ratings of an individual 2500.
- Permanent water, larger batteries, dense cabinetry, roof equipment, hitch carriers, multiple occupants, commercial cargo, or frequent towing may justify searching for a 3500 with more available capacity.
- A poorly maintained 3500 is not automatically a better foundation than a clean, suitably rated 2500 with documented maintenance.
Two terms govern the decision:
- GVWR, or gross vehicle weight rating, is the maximum total loaded vehicle weight specified for the individual van.
- Payload is the capacity remaining after accounting for the vehicle’s own weight. The conversion, occupants, cargo, accessories, and trailer tongue weight all draw from it.
Do not infer either figure from the badge alone. Ratings can differ with model year, wheelbase, body, drivetrain, factory equipment, and installed options. A VIN may describe the original configuration but not later additions such as tanks, batteries, racks, carriers, bumpers, or conversion furniture. Savage Campervans emphasizes using the exact van’s ratings and completed weight rather than the 2500 or 3500 badge.
Before buying materials:
- Photograph and read the vehicle’s certification label.
- Confirm the VIN-specific factory configuration.
- Record the GVWR and front- and rear-axle ratings shown in the applicable vehicle documentation.
- Weigh the van in its current condition, preferably with separate axle readings.
- Record the fuel level, occupants, cargo, and existing equipment present during that weigh-in.
- Estimate proposed components and their likely front-to-rear placement.
- Add only loads not already included in the baseline scale weight.
- Account for travel occupants, food, water, luggage, work materials, hitch equipment, and towing loads.
- Retain a margin for estimating errors and later additions.
This process may show that the attractive van is the wrong body length, that a planned tank would heavily bias the rear axle, or that towing margin disappears once passengers and equipment are aboard. Discovering that before construction is cheaper than redesigning a finished interior.
Plan Around the Express Roof and Low-Roof Geometry
The factory roof is one of the platform’s defining constraints. Sportsmobile reports approximately 50 inches of stock interior cargo height, which is not enough for most adults to stand upright. Finished height may be lower after adding flooring, insulation, and a ceiling. Measure the exact van at several points because roof ribs, curved walls, trim, doors, and wheel wells reduce usable space differently across the body.
Three roof strategies are practical.
Retain the low roof
A low roof preserves exterior clearance, can fit more garages and parking structures, and avoids a major roof alteration. It can work well for travelers who sleep in the van but spend most waking hours outside, or for work vans whose users do not need a standing aisle.
The compromise is seated or stooped movement. Cooking, dressing, working, retrieving tools, and getting into bed must be designed around seated headroom. A weak low-roof layout forces occupants to crawl over one another or move the same cushions, bins, and table parts repeatedly.
Add a fixed raised roof
A fixed raised roof can create permanent headroom and make an aisle, changing area, work zone, or passenger cabin more usable. It may also support upper storage or entertainment equipment.
Before committing, ask an experienced installer how the proposed roof fits the exact body and how structural work, drainage, equipment mounting, insurance, inspection, warranty responsibility, and future repairs will be handled. A seller’s fit claim or a visually clean installation is not a substitute for vehicle-specific documentation.
Install a pop-top
A pop-top preserves a lower traveling profile while creating deployed standing room. Some designs may also provide an additional sleeping platform.
Investigate weather resistance, storage height, roof-equipment compatibility, maintenance access, deployed ventilation, and whether the top can close with bedding in place. A pop-top and fixed roof solve different problems; one is not merely the cheaper version of the other.
Once the roof strategy is settled, compare three layout families.
1. Fixed rear bed with gear storage
A permanent bed eliminates nightly setup and creates a large storage area underneath. It suits outdoor equipment, work bins, or a rear slide-out cooking area. Its cost is reduced daytime floor area and a large permanent structure at the back of the van.
2. Convertible couch-bed with a work or dining table
This arrangement creates daytime seating and can make a low-roof interior feel more open. It suits remote workers and travelers who spend bad-weather days inside. Its drawbacks are daily conversion, bedding storage, moving hardware, and the possibility that cargo blocks the bed mechanism.
3. Passenger-focused cabin with captain’s chairs or a sofa bed
This layout prioritizes travel comfort, occupant access, luggage, and entertainment. A rear sofa may provide a parked-use bed, but travel-seat suitability must be verified independently. Every occupant and seat also consumes capacity that a two-person camper could otherwise use for water or equipment.
Published kit dimensions illustrate how tight the geometry can be. VanLab’s 155-inch-wheelbase furniture kit lists a 73-by-58-inch east-west bed frame and approximately 75 inches window to window, alongside kitchen furniture, bench storage, tables, and a rear garage. Those dimensions describe that seller’s product, not every finished Express interior. VanLab publishes the kit’s dimensions and included layout.
A separate simple DIY build used a nominal 54-by-75-inch mattress, but the builder reported that walls and insulation reduced the available finished length. This is an owner’s experience, not a universal clearance figure. Global Shenanigans documents the mattress and finished-space constraint.
Use painter’s tape, boxes, and cardboard to create a full-size mock-up. Test:
- Bed length and shoulder room
- Seated headroom on the bed and bench
- Aisle width with cabinet doors open
- Side- and rear-door access
- Refrigerator, toilet, or work-bin removal
- Cooking position and planned ventilation
- Work posture and table height
- Storage access while the bed is occupied
- Entry and exit without climbing over another person
- Clear routes to doors
- Access to equipment that may require inspection or repair
Spend an evening using the mock-up. Pretend to arrive in rain, change clothes, prepare food, retrieve a bag, set up the bed, and leave through more than one door. Layout flaws appear quickly when the van is treated as a sequence of actions rather than a floor-plan drawing.
Compare the Real Cost of DIY, Kits, Professional Builds, and Completed Vans
There is no useful universal price for a Chevy Express conversion. Plywood and a mattress, a commercial shelving package, an off-grid camper, and a professionally finished passenger van are different purchases.
Build each estimate with separate lines for:
- Base van
- Immediate repairs and deferred maintenance
- Conversion materials
- Appliances and fixtures
- Tools and consumables
- Outsourced labor
- Mechanical and conversion-system assessments
- Taxes and registration
- Delivery or travel to collect the van
- Insurance changes
- Contingency
- Owner labor
Historical DIY examples show how strongly scope affects cost.
A novice project completed in 2019 reported $10,000 total, including a $4,500 passenger van and a stated $5,500 conversion budget. The builders finished in about five weeks while using borrowed tools, workspace, and occasional experienced help. It is a dated example of a focused DIY build—not a current minimum price. The Vanabond Tales documents the project’s cost, schedule, and borrowed resources.
A more elaborate 2020 project reported $12,000 for a 2012 extended Express and about another $12,000 for the conversion. The build included onboard water, refrigeration, lithium batteries, solar and alternator charging, ventilation, cabinetry, several cooking options, and a convertible bed. The owner reported eight months and approximately 1,500 working hours while employed full time and brought prior product-design and woodworking experience. Create Your Own Roadshow details the project’s budget, systems, experience, and timeline.
These examples should not be combined into a market range. They come from different years, vehicles, scopes, skills, and working conditions, and neither automatically assigns a market value to owner labor.
A kit can reduce layout and fabrication work, but its starting price is rarely the installed total. VanLab lists its 155-inch Express/Savana furniture kit from $7,950, excluding the van and several optional finishes and systems. The product page separately lists paid options such as flooring, cushions, electrical equipment, a fan, plumbing, refrigeration, and installation. Batteries, charging equipment, an inverter, delivery, repairs, and other work can further widen the gap between the headline price and a road-ready vehicle. VanLab’s product page shows the starting price and option structure.
Professional conversions belong in another category. Sportsmobile estimates approximately $40,000–$90,000 or more for conversion work before the van and about $75,000–$150,000 or more for a complete build. These are seller estimates rather than independent valuations, and the final specification determines what is included. Sportsmobile publishes those professional-build estimates.
Completed passenger vans create another comparison. In the supplied dealer snapshot, selected used luxury conversions were advertised from $45,995 to $65,995 plus sales tax. These were asking prices for vehicles of different years, mileages, and configurations—not appraisals or out-the-door totals. Paul Sherry Vans shows the used inventory and advertised prices.
Selected new 2026 Express conversion vans were advertised from $76,995 to $82,995 in dealer listings identified as updated in July 2026. Availability, equipment, fees, delivery, financing, and final prices can change. Conversion Van Land lists the dated new-vehicle examples.
Use a worksheet that distinguishes necessities from preferences:
| Category | Required now | Optional now | Deferred upgrade |
|---|---|---|---|
| Vehicle and repairs | |||
| Roof and ventilation | |||
| Insulation and surfaces | |||
| Bed and seating | |||
| Commercial storage or passenger trim | |||
| Electrical | |||
| Water and plumbing | |||
| Heating and cooking | |||
| Storage and hardware | |||
| Tools and shop supplies | |||
| Professional work and assessment | |||
| Tax, registration, and delivery |
Add a contingency appropriate to the project’s age, complexity, and unknowns. Keep owner labor on a separate line even if no cash will change hands. That makes DIY, kit, professional, and completed-van paths easier to compare honestly.
Build in the Right Order: Layout, Loads, Shell, Systems, and Testing
Conversion order matters because finished surfaces and furniture can conceal leaks, fasteners, wiring, and plumbing joints. At the planning level, a practical sequence is:
- Define occupants, trip type, travel seasons, destinations, and required cargo.
- Inspect the van mechanically and structurally.
- Weigh it and document what was aboard.
- Inventory passengers, gear, tools, food, water, and towing equipment.
- Mock up the layout at full scale.
- Estimate completed weight distribution and electrical demand.
- Remove only what the plan requires.
- Address visible leaks, rust, damaged seals, and unused openings.
- Plan penetrations, wiring routes, ventilation, and future access.
- Identify structural backing and concealed utility routes before surfaces cover them.
- Select insulation and finishes for the intended climate and use.
- Install surfaces and planned systems in an order that preserves testing access.
- Anchor furniture and equipment using a vehicle-appropriate design evaluated for the application.
- Test installed systems before closing access panels.
- Load the van for travel and obtain front-axle, rear-axle, and total weights.
This is a workflow, not a construction specification. It does not determine conductor size, overcurrent protection, roof reinforcement, fuel-system design, seat installation, or compliance. Those questions require equipment instructions, vehicle-specific information, and qualified review.
Ventilation and moisture planning belong beside insulation. People, wet clothing, cooking, and some heating arrangements add moisture to a small interior. No single insulation assembly can be assumed to prevent condensation or corrosion in every climate. Plan how air will move, where moisture may collect, and how concealed areas and seals can be inspected.
A limited three-season camper can remain genuinely simple. One documented owner build used rigid insulation between ribs, furring strips, plywood surfaces, a permanent rear bed, privacy covers, rechargeable lighting, and outdoor food preparation. It omitted a fixed water system, elaborate house electrical installation, and indoor kitchen. That reduced the number of components requiring space and maintenance.
Scope expands quickly in a detailed build. The documented 2012 extended Express added two roof fans, heating, onboard water, lithium batteries, solar and alternator charging, refrigeration, multiple cooking options, cabinetry, and a convertible bed.
Electrical equipment should follow an appliance-level energy audit. For each proposed load, record:
- Operating power or measured current
- Expected use per day
- Daily energy consumption
- Startup or peak demand
- Loads likely to operate simultaneously
- Whether an inverter is required
- Available charging sources
- Expected weather, shade, and driving patterns
- Conversion and wiring losses
- Desired reserve
Do not select a battery or solar array simply because another Express owner used it successfully. A system supporting laptops and lights differs fundamentally from one intended to run refrigeration, an electric cooker, water heating, or climate equipment.
During planning, identify how batteries, disconnects, protective devices, pumps, tanks, plumbing joints, appliance fasteners, and factory service points will remain reachable. Ask the installer or system designer how each component will be isolated, inspected, removed, and tested before furniture or wall panels make access difficult. Commercial builders likewise need access to equipment mounts, drawers, partitions, and factory service areas.
Timelines are scope-dependent. A departure date should not force unfinished structural, restraint, electrical, combustion, or weight-related decisions. Build milestones around mock-up approval, system testing, inspection where appropriate, and final weighing.
Manage Payload, Towing, and Drivetrain as One Travel System
Start with a clearly defined baseline. If the scale weight already includes fuel, a driver, existing shelving, or conversion components, do not add those items a second time.
| Load | Weight to add | Approximate location |
|---|---|---|
| Baseline van as weighed | Front and rear readings recorded | |
| Fuel not already aboard | ||
| Insulation and finished surfaces | ||
| Bed, seating, shelving, and cabinetry | ||
| Batteries and electrical equipment | ||
| Fresh water | ||
| Waste water | ||
| Refrigerator, appliances, or work equipment | ||
| Roof fan, rack, solar, or raised roof | ||
| Hitch, carrier, or recovery equipment | ||
| Driver and passengers not in baseline | ||
| Food, clothing, luggage, tools, and materials | ||
| Trailer tongue weight | Usually rear-biased | |
| Travel-ready total |
Payload and towing capacity are separate constraints. Trailer tongue weight adds load to the van, so a quoted trailer maximum cannot be evaluated without also considering occupants, conversion weight, cargo, hitch limits, axle loading, and applicable combined vehicle requirements.
When the build is complete, weigh it in representative travel condition: normal occupants, fuel, water, food, luggage, work materials, hitch accessories, and the trailer when relevant. Compare the front-axle, rear-axle, and total readings with the ratings and documentation applicable to the individual van. A total below GVWR does not establish that each axle is within its own limit.
The supplied seller guidance generally describes the Express as rear-wheel drive. It also says GM does not offer factory 4x4 and identifies Quigley systems for certain 2500 and 3500 vans as aftermarket conversions. Treat that as a starting point for investigating a candidate vehicle, not a substitute for its records.
Do not use “AWD,” “4x4,” and “aftermarket four-wheel drive” interchangeably. Ask:
- Who manufactured and installed the system?
- Is it factory equipment or a later conversion?
- How does it operate?
- Which original components were altered?
- What maintenance does it require?
- What documentation, parts information, and service support accompany it?
Do not assume that they increase manufacturer-certified GVWR, GAWR, payload, or towing limits without authoritative documentation applicable to the vehicle.
For the same reason, avoid applying one generic payload, axle, or towing figure to all Express vans. Model year, wheelbase, body, drivetrain, equipment, hitch, and installed conversion weight can all affect the relevant limits.
Know Which Work to Outsource or Have Inspected
The goal here is not to prescribe code-compliant construction. It is to identify decisions that deserve qualified installation, review, or direct verification.
Higher-risk work can include:
- Roof cuts and major penetrations
- Raised-roof or pop-top installation
- Structural alterations
- Removal, alteration, or addition of restraints
- Travel-seat and child-restraint positions
- High-current DC systems
- Shore-power systems
- Battery containment and mounting
- Propane or other combustion systems
- Fuel-fired heaters
- Heavy roof-, wall-, floor-, or hitch-mounted equipment
Before choosing electrical equipment, calculate the intended loads and ask a competent designer or installer to explain conductor selection, circuit protection, routing, abrasion and heat exposure, equipment mounting, isolation, and inspection access. A commercial conversion company identifies undersized power systems, unsafe wiring, inaccessible plumbing, poor weight distribution, and inadequate ventilation as recurring problems, while recommending professional help when work exceeds the builder’s competence. That is general commercial guidance, not an electrical or vehicle standard. The Vansmith outlines those planning concerns and access principles.
Use the same question-led approach for ventilation, fuel-burning equipment, and moisture management:
- How will fresh air enter and leave when people are sleeping?
- What equipment instructions govern clearances and ventilation?
- Where could moisture collect?
- How will seals and hidden areas be checked?
- How will fuel, batteries, and electrical equipment be isolated and serviced?
- Who will assess the installation before use?
Cabinetry, tanks, batteries, appliances, tools, and commercial equipment require mounting designed for a moving vehicle. Avoid claims that a particular plywood thickness, screw count, or bracket arrangement is “crash safe” unless relevant testing or engineering supports the complete installation.
Local rules may govern seating, belts, child restraints, registration class, inspection, emissions, insurance, and classification as an RV or motorhome. The evidence used for this article does not establish jurisdiction-specific requirements. Verify them directly with the relevant agencies, insurer, vehicle documentation, and qualified installers before making irreversible changes.
Use this pre-trip list as a set of verification questions, not a certification checklist:
- Have shell leaks and roof penetrations been assessed?
- Can electrical equipment and protective devices be inspected and reached?
- Are batteries and heavy equipment mounted according to an appropriate design?
- Can plumbing joints, tanks, pumps, and drains be reached?
- Has combustion or fuel-system work received appropriate review?
- Are doors and planned exit routes unobstructed?
- Does ventilation operate as designed?
- Have alarms and extinguishing equipment been selected and installed under applicable instructions and guidance?
- Are tires and chassis components appropriate for the van’s actual loaded condition?
- Have front-axle, rear-axle, and total weights been measured?
- Are manuals, diagrams, model numbers, and shutoff instructions stored in the vehicle?
Treat a Used Conversion as Two Separate Purchases
A used converted Express is both a motor vehicle and a collection of installed systems. A polished interior does not prove that either part is sound.
For the base vehicle, investigate:
- VIN-specific configuration
- Certification label and weight ratings
- Maintenance and repair records
- Rust, including underneath and around prior openings
- Roof, door, window, and body leaks
- Tire condition, age, and load suitability
- Brakes, steering, and suspension
- Warning lights and diagnostic history
- Evidence of collision repair or water damage
- Hitch and towing equipment
- Condition and documentation of aftermarket drivetrain components
For the conversion, investigate:
- Raised-roof seams and every penetration
- Wiring layout, labels, protection, routing, and access
- Battery type, age, mounting, containment, and charging equipment
- Shore-power inlet and connected equipment
- Plumbing leaks and provisions for draining or winterization
- Access to pumps, joints, tanks, and drains
- Heater, stove, and fuel-system installation
- Cabinet, shelving, partition, and appliance mounting
- Ventilation and fan operation
- Condition and documentation of installed travel seats and restraints
- Door and exit access
- Evidence of unrecorded later alterations
Ask for an itemized equipment list, installer records, manuals, receipts, warranty documents, electrical and plumbing diagrams, and records of later repairs. Match model numbers to installed components rather than relying on a generic sales description.
Test systems under representative load with someone competent to interpret the results. Likewise, an empty commercial shelf does not demonstrate how the van handles with its normal tools or materials aboard.
Obtain an appropriate mechanical pre-purchase inspection and, when the conversion warrants it, a separate assessment by someone qualified to evaluate the installed systems. If feasible, weigh the van with realistic occupants, water, equipment, and travel cargo. Upholstery quality says nothing about remaining payload or axle balance.
Treat dealer listings only as dated asking-price evidence. They do not establish independent value, workmanship, vehicle history, warranty coverage, or final cost.
Finally, verify compatibility before buying replacement furniture, flooring, glass, roof components, or kits. Model year, 135- or 155-inch wheelbase, cargo or passenger body, roof type, trim, door arrangement, and prior modifications can all affect fit. The GMC Savana is a related platform supported by some of the same conversion products, but that does not prove that every component fits every Express and Savana configuration.
Compare the Express with Taller Van Platforms Before Committing
The supplied evidence does not support a complete model-by-model comparison with the Ford Transit, Mercedes-Benz Sprinter, and Ram ProMaster. Instead, use this matrix as a pre-purchase research checklist.
| Decision factor | Chevy Express question | Taller-platform question |
|---|---|---|
| Acquisition price | What do comparable local vans cost in the required condition and configuration? | Does a taller van’s price change the available conversion budget? |
| Standing height | Can the trip work with seated ergonomics or a modified roof? | Can a factory high roof avoid a major roof conversion? |
| Body choices | Which wheelbase, body, doors, and passenger features are available? | Which lengths, heights, and door arrangements fit the layout? |
| Payload | What remains after the conversion, occupants, and cargo? | What remains after the competitor’s own curb weight and options? |
| Fuel use | What does the candidate consume on representative routes and loads? | How do engine, roof, speed, load, and route affect the alternative? |
| Drivetrain | Does the exact van have documented factory or aftermarket equipment? | Is the required factory drivetrain offered in the target body? |
| Service plan | Who can service the base van and any aftermarket systems? | Are suitable service locations available on planned routes? |
| Parking clearance | Will the low or modified roof fit home storage and regular parking? | Will a factory high roof clear those locations? |
| Conversion cost | Will roof work or custom low-roof furniture dominate the budget? | Does the taller body reduce roof work but increase other costs? |
| Daily layout | Can the required activities be completed comfortably while seated? | Does standing height materially improve those activities? |
The Express’s central trade-off is its low factory roof. The body-on-frame, rear-wheel-drive configuration described by seller guidance may fit some towing-, cargo-, or low-clearance plans, but standing room usually requires a different interior strategy or a roof conversion. Sportsmobile also characterizes fuel economy as relatively poor; actual consumption still depends on the individual vehicle, conversion, speed, load, and route.
A Transit, Sprinter, or ProMaster with a factory high roof may remove the need for an aftermarket roof. That does not automatically make it cheaper or more suitable. Purchase price, drivetrain, wheelbase, width, service arrangements, axle limits, parking height, and component costs require model-specific research beyond the evidence available here.
Include the GMC Savana in the search because some conversion products are offered for both platforms. Verify every component against the exact year, wheelbase, body, roof, trim, doors, and existing modifications instead of assuming universal interchangeability.
Use this final go-or-no-go test:
- How many people must ride in verified travel positions?
- How many must sleep inside?
- What exact configuration and ratings does the candidate van have?
- Does a full-size mock-up work with the available roof height?
- What is the complete purchase, repair, conversion, assessment, and registration cost?
- What will the van weigh with occupants, fuel, water, cargo, and trailer tongue weight?
- What are the estimated and measured front- and rear-axle loads?
- What is the daily electrical demand, and how will it be replenished?
- Which tasks need qualified installation or review?
- Can the vehicle and any aftermarket systems be serviced where it will travel?
If the plan fits the roof, axle limits, budget, service needs, and intended roads with a reasonable margin, the Express can be evaluated as a viable platform. If standing height, drivetrain requirements, or payload remain unresolved, compare another Express configuration or another van before buying.
Can you stand up inside a stock Chevy Express?
Generally, no. Sportsmobile reports approximately 50 inches of stock interior cargo height, which is not enough for most adults to stand upright. Flooring, insulation, and ceiling finishes can reduce the finished height further. Measure the exact van before choosing between a seated low-roof layout, fixed raised roof, and pop-top.
How much does a Chevy Express conversion cost?
There is no universal range. The documented examples in this guide include a basic owner-built project with a stated $5,500 conversion budget, a more detailed project reporting about $12,000 in conversion spending, a furniture kit starting at $7,950, and substantially higher seller estimates for professional work. These figures come from different years and scopes and exclude different items.
Compare the complete cost of the van, repairs, materials, appliances, tools, labor, assessments, taxes, registration, delivery, and contingency.
Is a Chevy Express 2500 or 3500 better for a camper conversion?
Neither is universally better. A particular 2500 may suit a light weekend build, while a 3500 may offer more useful capacity for permanent water, dense cabinetry, larger electrical systems, roof or hitch equipment, passengers, commercial cargo, or towing.
Choose using the individual van’s certification label, actual axle weights, completed conversion estimate, occupants, cargo, and trailer tongue weight. Condition and maintenance history also matter more than the badge alone.
Does the Chevy Express have factory AWD or 4x4?
The evidence used here generally describes the Express as rear-wheel drive. The cited conversion guidance says GM does not offer factory 4x4 and identifies Quigley systems for certain 2500 and 3500 vans as aftermarket conversions.
Do not assume an advertisement using “AWD,” “4x4,” or “all-wheel drive” describes factory equipment. Verify the system’s manufacturer, installer, operation, documentation, altered components, and maintenance requirements.
How long does a DIY Chevy Express camper build take?
There is no standard duration. One basic novice project reported about five weeks with borrowed tools, workspace, and occasional help, while a much more detailed conversion reported eight months and approximately 1,500 working hours. The two documented owner-build schedules show how sharply scope and experience can change the timeline.
Mechanical repairs, layout complexity, tools, skill, weather, outsourced work, and the number of roof, electrical, water, heating, and storage systems can all change the schedule. Allow time for mock-ups, troubleshooting, appropriate review, and final axle weighing rather than treating the first departure date as fixed.