
Mouse-Proof Your Camper: Reliable Steps to Protect It on the Road and in Storage
Mice can chew foam, plastic and many soft fillers, while metal makes that much harder. Seal likely gaps, remove attractants and monitor with traps.
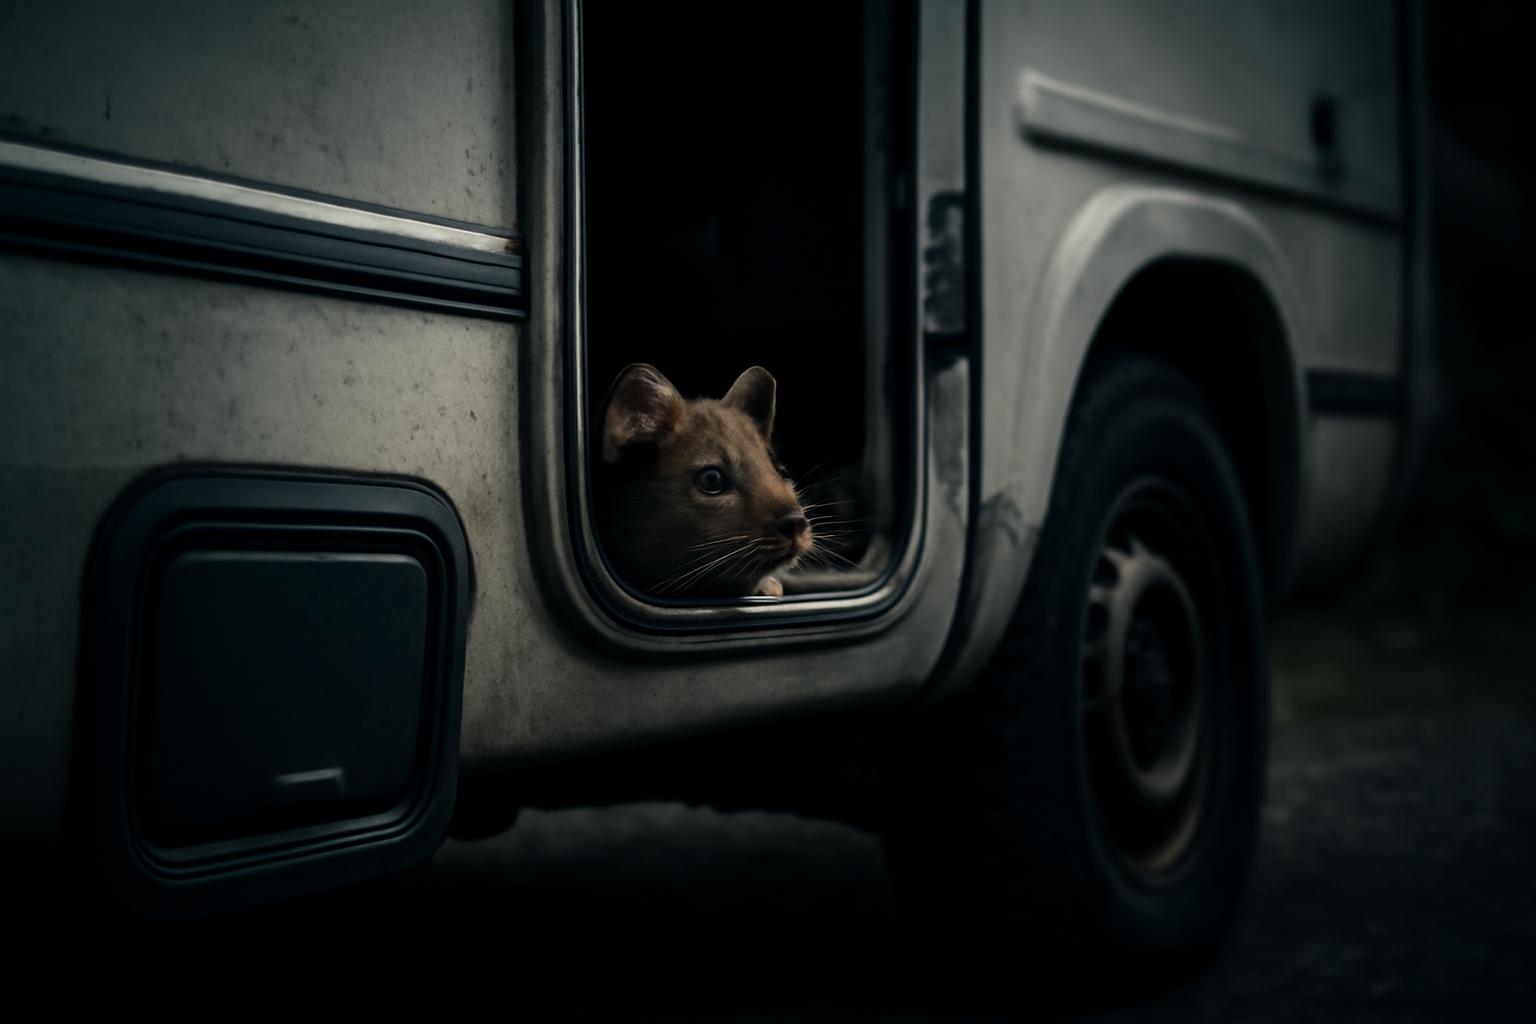
If you want to know how to keep mice out of camper interiors, storage compartments, and hidden cavities, the practical answer is straightforward: inspect carefully, seal gaps with chew-resistant materials, remove food and nesting material, park in less rodent-friendly spots, and use traps to confirm whether your setup is working.
That does not mean it is easy. Campers have a lot of small penetrations—around pipes, wiring, vents, slide-outs, underbellies, access panels, and frame openings—and mice do not need much space. Across RV owner threads, pest-control pages, campground blogs, and RV retailer guides, the most consistent point is this: physical exclusion works better than scent-based deterrents. Peppermint oil, soap, dryer sheets, and ultrasonic devices all get mixed reviews. Metal mesh, steel or bronze wool, vent screens, good cleaning habits, hard-surface parking, and traps come up again and again because they address entry and attraction directly.
Evidence note: Most published advice on this topic comes from RV owner forums, commercial pest-control pages, campground blogs, and RV retailers rather than independent lab testing. That means the strongest conclusions here are the ones repeated across many sources: seal holes, remove attractants, park smart, and monitor with traps. Product-specific repellent claims are much less certain.
Priority checklist
- Inspect the underside, penetrations, vents, panels, drawers, and hidden voids
- Seal dime-sized and 1/4-inch gaps with metal-based barriers, then finish with sealant
- Clean out crumbs, food, cloth, paper, and cardboard before storage
- Park smart on pavement, concrete, or gravel and away from brush when possible
- Trap and monitor so you know whether mice are still visiting
- Call a pro if you find heavy contamination, deep nests, strong odor, or chewed wiring
Below is a step-by-step plan for winter storage, driveway parking, campgrounds, and boondocking.
Why Mice Target Campers and the Damage They Cause
Mice get into campers for the same reasons they get into sheds, garages, and houses: food, moisture, warmth, and shelter. Orkin’s RV guidance makes that point directly, and Victor’s RV article says winter storage is when many infestations happen because the unit sits quiet and undisturbed for long stretches.
Campers are especially vulnerable because they are full of small openings. KOA, Victor, Berryland Campers, Outdoorsy, and several RV owner threads all point to the same types of weak spots:
- Gaps around wiring and plumbing
- Underside openings and belly pans
- Access panels
- Vents
- Slide-out seals
- Door and window gaps
- Floor penetrations
- Frame openings
Several RV guides say mice can squeeze through an opening about the size of a dime. Some owner advice treats 1/4 inch or larger as the practical threshold for sealing. Either way, the working rule is simple: if a gap looks small but real, treat it as a candidate entry point.
Once mice get inside, the damage can be much worse than a few droppings in a cabinet. Across the evidence pack, the main risks are consistent:
- Chewed wiring, which can create expensive electrical problems and possible fire hazards
- Damage to plastic and rubber lines
- Nests in insulation, bedding, furniture, or hidden cavities
- Contaminated cabinets and storage areas from droppings and urine
- Health concerns tied to rodent waste; RV guides commonly mention illnesses such as salmonellosis
The first signs are often subtle. Common indicators mentioned across KOA, Outdoorsy, Victor, and owner reports include:
- Rice-sized droppings
- Gnaw marks on trim, food packaging, fabric, or wiring covers
- Shredded paper, insulation, or cloth
- Musky or stale odors
- Scattered wrappers or moved items
- Scratching or squeaking sounds, especially at night
- Food damage, including bite marks and holes in packaging
You may find evidence under sinks, behind drawers, around the water pump, near appliance access points, inside storage bays, or in the enclosed underbelly.
You may also run into dramatic numbers about how common the problem is. One RV retail article claims nearly 7 in 10 stored RVs experience mouse damage if left unprotected, and cites average damage around $3,500 for electrical and insulation repairs. Those figures are best treated as cautionary marketing claims, not verified industry benchmarks. But the broader point is solid and well supported elsewhere: rodent damage can get expensive fast, especially when wiring and hidden spaces are involved.
That is why prevention matters. Catching a mouse is annoying. Discovering months later that it has been nesting behind a wall or chewing wiring under the floor is a repair job.
Step 1: Inspect for Entry Points and Signs of Mice
Before you buy repellents or set a dozen traps, figure out where mice can get in and whether they already have. Inspection is the foundation for everything that follows.
A useful inspection has two parts:
- Outside and underneath
- Inside and behind things
Start underneath the camper
Victor recommends crawling under the RV to look for likely entry points, and both Victor and owner forum threads describe using light to find them. On a sunny day, get underneath with a flashlight and look for:
- Light leaks
- Torn or loose underbelly material
- Open seams
- Gaps around utility penetrations
- Unscreened openings
- Damaged slide seals
- Gaps at access panels
Pay close attention to:
- Wiring penetrations
- Plumbing penetrations
- Belly pan openings
- Frame holes
- Slide-out corners
- Brake-wire pass-throughs
- Areas where hoses, pipes, or cables enter the body
If your camper has an enclosed underbelly, inspect every place where something passes through that enclosure. A gap around one pipe can be enough.
A simple trick repeated in RV guidance is to use light as a test. If light gets through, air gets through. If air gets through, a mouse may fit too.
Inspect hidden interior spaces, not just the living area
Mice usually do not stay in the middle of the floor where you can spot them easily. They move along edges and inside voids.
Orkin recommends inspecting behind plumbing, heating, and electrical access panels. Owner reports and RV guides also point to these spots:
- Behind plumbing and electrical panels
- Behind and under drawers
- Back corners of cabinets
- Around the water pump
- Around the water heater area
- Near furnace penetrations
- Around floor pipe holes
- Behind refrigerator or closet floor areas, if accessible
- Inside pass-through storage
- Around wheel-well areas
Removing drawers is often worth the trouble. Several owner discussions say the cavities behind kitchen and bathroom drawers are classic travel routes.
Inside, look for:
- Droppings
- Gnaw marks
- Shredded nesting material
- Food damage
- Odors
- Rub marks along edges
- Nests tucked into corners or cavities
If you own a motorhome, check the engine compartment too. Orkin specifically suggests walking through the RV regularly and starting the engine on motorhome-style rigs to discourage rodents from settling in the engine bay.
Know your model-specific weak spots
Generic advice helps, but some campers have repeat problem areas specific to the model.
A good example comes from T@B owner discussions. Owners identified large oval frame openings and floor penetrations as possible rodent access points. In that same discussion, a nuCamp tech-support response said the frame holes exist to allow structural flex and are not necessarily meant to be solidly blocked. Owners often cover them with mesh or hardware cloth so pests are blocked while the opening is not rigidly plugged shut.
That principle applies well beyond T@B trailers. If your camper has factory openings in the frame, vent areas, or odd cutouts that look suspicious, do not assume they are safe just because they came that way. Some openings may need a screened cover, not a solid filler.
Check seals and openings above ground too
Not every mouse enters from the belly. KOA, Victor, and Berryland all mention above-ground entry points such as:
- Cracks around doors
- Gaps around windows
- Poor weatherstripping
- Slide-out seal gaps
- Loose access hatches
- Exterior vent openings
These are easy to overlook because they seem less “mouse-like” than the underside, but they still matter.
Build a repeat inspection routine
Storage is when small problems become large ones. A sensible routine is:
- Before storage
- Monthly during storage
- Before first use in spring
- After rough-road travel or long trips
If you camp frequently, add a shorter version to your normal pre-departure walkaround. A five-minute check under the camper and around compartments can catch damage before it turns into a nesting site.
Step 2: Seal Entry Points with Chew-Proof Barriers
Once you know where the openings are, the next job is to block them with materials mice do not readily chew through.
This is the heart of how to keep mice out of a camper. Traps, scents, and parking choices help, but sealing is the main defense.
Best materials for small and medium gaps
Across Victor, Berryland, Forest River owner threads, Outdoorsy, and other RV guides, the most consistently recommended materials are:
- Steel wool
- Bronze or copper mesh/wool
- Hardware cloth
- Metal mesh
- Metal vent screens
The reason is simple: mice can chew foam, plastic, and many soft fillers, but metal makes that much harder.
For small openings around pipes, wiring, or tubing, the common approach is:
- Pack the hole tightly with copper mesh, bronze wool, or steel wool
- Seal around the edges with silicone, caulk, or a small amount of foam
That gives you two things: chew resistance from the metal and closure from the sealant.
If the area may get damp, copper or bronze mesh has a practical advantage over ordinary steel wool because it is less likely to rust. Steel wool is still widely used and repeatedly recommended in RV threads, but moisture matters.
Do not rely on foam alone
Spray foam shows up in almost every RV mouse-proofing discussion because it fills awkward shapes quickly. But the evidence pack is also clear that foam alone is a weak answer.
Owner reports say mice can chew it. T@B owners note that trailer motion can break foam down over time. Victor also warns that expanding foam can cause problems if overused.
A better rule is:
- Foam as filler: useful
- Foam as the only barrier: unreliable
For larger or irregular holes, make a layered repair:
- Add hardware cloth, metal mesh, or another rigid backing first
- Then close the remaining perimeter with silicone, caulk, or minimal foam
That approach makes more sense for:
- Pipe chases
- Floor penetrations
- Underbelly tears
- Utility cutouts
- Frame openings
- Access-bay gaps
Cover vents without blocking airflow
Vents need more care than ordinary holes. RV guides repeatedly recommend screening them, but you do not want to block an appliance opening that still needs ventilation.
Safer options include:
- Purpose-made RV vent screens
- Mud-dauber-style metal screens
- Hardware cloth cut to fit
- Metal mesh covers secured at the edges
The key is not brand name. The key is using a corrosion-resistant screen that stays in place and still allows the vent to function properly.
Do not stuff dense filler into a vent opening required for safe operation.
Seal the underside carefully
The underside is where many sealing jobs succeed or fail. Check and repair:
- Underbelly seams
- Gaps where belly material meets the frame
- Openings around tanks and lines
- Slide-out corners
- Cable pass-throughs
- Frame holes
- Hatch edges
- Openings around jacks or supports
For larger odd-shaped openings, owners report using:
- Hardware cloth
- Thin plastic panels
- Thin aluminum
- Gutter guard material
- Bug screen backed by sealant
Fastening methods mentioned in owner reports include screws, clips, strong tape, and sealant. If you are covering a factory hole or a place that may need some flex, a mesh cover is often better than trying to hard-plug it.
Replace worn weather seals
Berryland, KOA, and Victor all point to worn door and window seals as possible access points. Inspect for:
- Flattened weatherstripping
- Cracked seals
- Gaps at corners
- Misaligned compartment doors
- Worn slide-out seals
Replacing weatherstripping will not solve an underbelly problem, but it is inexpensive and worth doing.
Optional storage add-on: wheel and jack barriers
Some owners use slick barriers around wheels and jacks during storage to make climbing harder. One marketed aluminum system is designed specifically for that purpose. Its stated limitations are useful to understand even if you never buy it:
- It is intended for storage or non-use periods
- It does not solve access through cords, steps, or existing openings
- One example system requires about 10 inches of ground-to-axle clearance
That makes these barriers a supplement, not a primary defense. If your camper has obvious holes around wiring or plumbing, wheel guards do not fix that.
Reinspect after travel
Even a good sealing job needs maintenance. RVs flex. Sealant cracks. Tape loosens. Foam shrinks. Mesh gets bumped out of place.
That is why the most realistic version of “permanent” mouse proofing is not one miracle product. It is a sealing system you check and refresh.
Step 3: Remove Attractants Through Cleaning and Storage
A sealed camper is good. A sealed camper with nothing worth entering for is much better.
Mice are drawn by food and nesting material. If you remove both, a missed gap is less likely to turn into a full infestation.
Remove food completely before storage
For long-term storage, the safest move is still the simplest: take all food out.
That includes:
- Boxed pantry food
- Bread
- Cereal
- Pasta
- Snacks
- Pet food
- Drink mixes
- Open spices
- Condiments
- Wrappers
- Anything stored in cardboard or thin plastic
Orkin recommends emptying cabinets and refrigerators completely. KOA, Berryland, and Outdoorsy all stress food removal or tightly sealed storage.
If you must keep food in the camper during active travel, put it in airtight hard-sided containers. KOA suggests glass or plastic containers in higher cabinets. Victor adds an important caution: not every plastic bin is truly rodent-proof. Hard-sided containers are better than bags or boxes, but they are not a substitute for removal during storage.
Also avoid leaving pet food out overnight, especially while camping.
Remove nesting materials too
Many people focus on crumbs and forget the bedding side of the problem. Mice want soft, shred-friendly material.
Before storage, remove or tightly contain:
- Clothes
- Towels
- Blankets
- Washcloths
- Dishcloths
- Loose paper
- Cardboard boxes
- Fabric bags
- Paper towels
Orkin specifically advises removing towels, washcloths, and clothing for winter because mice often use cloth to build nests.
If you must leave textiles or papers inside, store them in sealed hard-sided bins. One RV storage guide also recommends keeping stored items 18 to 24 inches off the floor when possible. That specific height should be treated as practical storage advice rather than a hard rule, but the principle is sound: reduce hidden floor-level nesting opportunities.
Clean deeper than a quick sweep
Crumbs in the obvious places are a problem. Hidden residue is worse.
A real pre-storage clean should include:
- Vacuuming floors and corners
- Wiping countertops and shelves
- Cleaning cabinet interiors
- Vacuuming under cushions
- Pulling drawers and cleaning behind them
- Cleaning around the stove and sink
- Emptying and cleaning the refrigerator and freezer
- Checking odd storage pockets for wrappers or forgotten snacks
- Cleaning appliances
Orkin explicitly mentions cleaning appliances and removing crumbs and debris. Berryland stresses frequent wiping and vacuuming. Owner advice also emphasizes pulling drawers because food dust and nesting debris often collect behind them.
Sanitation matters because mice leave scent trails
A useful point from owner discussions is that mice do not just eat and leave. They urinate constantly and leave scent markers behind. Several RV owners describe sanitation as part of prevention because urine trails and pheromone trails can help attract more mouse activity.
So cleaning is not only about crumbs. It is also about erasing evidence of previous visits.
If you find droppings, clean them the careful way
Victor’s cleanup guidance is more cautious than the average forum post, and that is worth following. Do not dry sweep or vacuum fresh droppings, because that can stir contaminated dust into the air.
A safer process is:
- Open the camper and air it out
- Put on gloves
- Wet droppings, nests, and contaminated surfaces with disinfectant or a diluted bleach solution
- Let the area soak briefly
- Wipe up with paper towels or disposable cloths
- Bag the waste
- Wash your hands thoroughly
That approach is more important than chasing a perfect chemical recipe. The main goal is to avoid making contaminated dust airborne.
Set up storage to be less mouse-friendly
For longer storage periods:
- Use sealed hard-sided containers
- Remove cardboard
- Take out loose paper and cloth if possible
- Empty trash fully
- Clean the fridge and leave it empty
- Check monthly for fresh signs
- Keep clutter down
When the camper comes back into use, air it out and clean again before your first trip, even if you do not see obvious signs of mice.
Step 4: Park and Store Smart to Limit Access
Parking alone will not mouse-proof a camper, but where you store it changes the odds.
The most repeated guidance in the evidence pack comes from Orkin: park on a paved surface and keep the RV about 30 to 35 feet from grassy, brushy, or forested areas when possible. Outdoorsy and Berryland also recommend concrete, gravel, or pavement instead of grass.
Best parking surface and location
If you have a choice, store the camper on:
- Concrete
- Pavement
- Gravel
And try to keep it away from:
- Tall grass
- Brush
- Tree lines
- Wooded edges
- Stacked debris
- Woodpiles
The logic is simple. Vegetation gives mice cover. An open hard surface exposes them and may reduce easy access.
If you cannot get the ideal setup, improve what you can:
- Mow grass short
- Trim back brush
- Remove nearby junk or stacked material
- Keep vegetation off tires, jacks, and underbody edges
Minimize easy climbing routes during storage
Some owner advice suggests raising stabilizer jacks when possible and paying close attention to wheels, tongue jacks, and hitch areas. That is reasonable as a secondary step, especially if you are storing for months.
If you use wheel or jack barriers, remember they are storage accessories, not full solutions. Mice can also approach through cords, hoses, steps, or existing gaps in the body.
Check the camper during storage
A stored camper becomes more vulnerable the longer nobody looks at it.
Aim for at least a monthly check:
- Walk around the exterior
- Look underneath
- Check traps
- Check compartments
- Look for droppings
- Inspect seals and screens
- Confirm mesh repairs are still intact
That routine matters almost as much as the initial prep. A small failed repair in month one is much easier to fix than an active nest in month five.
Road-trip and campground parking matter too
Mouse prevention is not just a winter-storage issue. Active camping creates temporary access routes.
Outdoorsy notes that mice can climb via wheels and hitch areas. RV owner guidance also mentions these as possible access routes while parked:
- Power cords
- Water hoses
- Sewer connections
- Steps
- Jacks
- Tires
- Hitch or tongue areas
If you are camping in grassy, brushy, wooded, or desert-scrub areas, avoid tucking the camper tightly into heavy vegetation when you have a choice.
Travel habits that help:
- Put pet food away at night
- Clean up immediately after cooking
- Do not leave trash outside
- Inspect hookup points each morning
- Check under steps and around wheels before departure
Orkin also recommends vertical cones over hoses that lead into the RV. Other owner advice mentions collars or barriers on hookups for the same reason: reduce easy climbing routes while stationary.
Keep travel-specific prevention practical
The mouse-prevention version of a good walkaround is simple:
- Check the underside before leaving
- Look at cord and hose entry points
- Inspect lower compartments
- Watch for new gaps after rough roads
- Clean food debris daily while camping
Travel changes the weak spots, but not the core strategy. You are still trying to do the same four things: block entry, remove attraction, reduce access, and notice problems early.
Step 5: Layered Deterrents and Monitoring with Traps
Once gaps are sealed and attractants are gone, you can add deterrents and monitoring. This is the part of the topic that produces the most conflicting advice.
The evidence pack supports one clear conclusion: traps are useful, barriers matter most, and most repellents are inconsistent.
Start with traps, not miracle products
Across owner threads and RV guides, snap traps baited with peanut butter are among the most consistently recommended tools for both monitoring and control.
Place them:
- Along walls
- Near wheel wells
- Under sinks
- Near pipe chases
- Around suspected travel routes
- In exterior compartments
- Near wiring or plumbing penetrations
Set the trigger side toward the wall or edge the mouse is likely to follow.
Why traps matter even if you believe in prevention: they tell you whether your sealing and cleaning are working. A trap hit near one pipe opening gives you information. Repeated trap hits in the same area tell you where your system is failing.
Electronic traps and bucket traps also show up in owner reports, but ordinary snap traps remain the simplest baseline.
Be cautious with poison
Outdoorsy, Victor-related owner discussion, and other RV advice all raise the same problems with poison baits:
- Risk to pets
- Risk to wildlife
- The chance of dead mice inside inaccessible spaces
- Odor and cleanup issues
That does not mean nobody uses bait stations. Some owners do. But for most camper owners, exclusion plus traps is the more practical first-line strategy.
Ultrasonic devices: mixed, not primary
Ultrasonic repellers get some positive owner feedback, but the evidence is inconsistent. Some users swear by them. Others report no lasting effect.
The most cautious way to describe them is:
- They may help in some enclosed spaces
- They should not be treated as a standalone solution
- Owners who use them often place separate units in separate spaces rather than assuming one device covers the whole RV
That last point comes from RV how-to guidance, not from broad independent testing, so treat it as owner practice rather than proven rule.
Peppermint oil and similar scents: temporary at best
Peppermint oil is one of the most frequently mentioned scent-based options. Owner reports and RV blogs describe using it on cotton balls, tea bags, or in sprays. Some people report good results. Others still get mice.
The most consistent limitations are:
- It fades
- It needs reapplication
- It does not fix open entry points
- It may be unsafe around some pets, especially cats and small animals
So peppermint is best treated as an optional short-term layer, not a dependable primary defense.
Dryer sheets, Irish Spring, Fresh Cab, mothballs: inconsistent
These remedies are everywhere in RV discussions, and the evidence pack is blunt about how uneven the results are.
Common reports include mice:
- Ignoring them
- Chewing them
- Nesting with them
- Avoiding them briefly, then returning
The pattern in the sources is pretty clear:
- Dryer sheets: unreliable
- Irish Spring soap: unreliable
- Mothballs: not a dependable answer
- Fresh Cab: mixed; some owners report reduced activity, others say mice chew the pouches
Fresh Cab has better support than soap bars or dryer sheets, but it still does not rise to the level of trusted standalone protection.
Other add-ons: possible help, weak evidence
You will also see advice about:
- Undercarriage lubricant sprays
- Predator urine
- Fake snakes
- Noise devices
- Keeping a cat near storage
- Greased entrances
These are mostly anecdotal. Some owners say they help, particularly in storage setups, but the evidence is much thinner than it is for sealing and cleaning.
Undercarriage sprays are a good example. They are marketed heavily and mentioned positively in some owner discussions, but even supporters generally treat them as storage-only supplements, not a replacement for physical exclusion.
Monitoring tools are underrated
Not every useful tool has to be a killing tool. Monitoring helps you answer the real question: are mice still coming around?
Low-tech options mentioned in the evidence include:
- A dusting of flour near suspected entry points to reveal tracks
- Glue traps along walls to identify travel routes
- Indicator traps in compartments and under sinks
Many owners prefer snap traps for actual control, but glue traps do show where activity is happening. The bigger lesson is not the exact device. It is that you should measure whether the problem is gone instead of assuming.
Handling Active Infestations and Road Trip Tips
If mice are already inside, prevention becomes a two-stage job:
- Stop the active infestation
- Then sanitize and reseal thoroughly
Trying to deep-clean while mice are still entering usually wastes time.
First, trap and identify the route
When you find fresh droppings, active sounds, or obvious nesting:
- Set snap traps in likely travel routes
- Inspect for the most likely entry gap
- Seal obvious secondary gaps right away
- Keep checking traps daily
Victor’s RV guidance recommends waiting until you have about a week with no new catches before doing the most extensive cleanup. That is a sensible threshold. It reduces the chance that you sanitize one day while fresh mice enter the next.
Then sanitize carefully
Once trap activity and fresh signs stop:
- Air out the camper
- Put on gloves
- Wet droppings, nests, and contaminated areas with disinfectant or diluted bleach solution
- Wipe rather than dry sweep
- Bag waste securely
- Clean surrounding surfaces
- Wash hands and tools
If soft goods are badly contaminated, wash them thoroughly or discard them.
Know when the problem is beyond DIY
Consider professional help when you find:
- Heavy droppings or widespread contamination
- Deep nests in walls or insulation
- Strong odor from inaccessible areas
- Evidence of wire damage
- Re-entry after repeated sealing attempts
- Damage near electrical or mechanical systems
Orkin openly recommends professional help for droppings and nests, which is partly sales-driven, but the underlying point is fair. There is a level of infestation where cleanup, cavity access, and repair become more than a casual weekend job.
Travel-specific tips when you are camping
Active travel changes the risk pattern. The camper is occupied more often, which helps, but you also create temporary access routes.
Watch these especially:
- Power cords
- Water hoses
- Sewer hoses
- Steps
- Jacks
- Slide-outs
- Open compartment doors during setup
- Pet food bowls at night
Useful habits while camping:
- Use hose cones or collars if you have them
- Do not leave food or trash out overnight
- Sweep and wipe up after dinner
- Store snacks in sealed containers
- Check cords and hoses before bed and before departure
- Inspect under the camper after staying in grassy or brushy spots
If you boondock in rodent-heavy terrain, expect to inspect more often than someone staying mostly on paved campground pads.
Accept that no single fix is foolproof
This is the most honest bottom line in the evidence.
No scent, spray, screen, trap, or gadget guarantees a mouse-free camper. Even strong sealing jobs can miss something. Even hard-surface storage can still get activity.
What works best is layering:
- Inspect thoroughly
- Seal with chew-resistant materials
- Remove food and nesting material
- Park in a less rodent-friendly location
- Monitor with traps and repeat inspections
That is not glamorous, but it is the closest thing to a reliable system.
FAQ
Do ultrasonic repellents or peppermint oil reliably keep mice out?
Not reliably.
Both get mixed reviews in RV owner reports and how-to guides. Some campers owners say ultrasonic devices help. Some say peppermint helps. Others still get mice.
The main limitation is simple: neither one fixes open entry points or leftover food odors.
If you want to try them, treat them as secondary layers:
- Ultrasonic devices: optional add-ons with inconsistent results
- Peppermint oil: temporary and needs refreshing; use caution around pets
They may help in some setups, but they are not the foundation of a good mouse-prevention plan.
Are dryer sheets, Irish Spring soap, or Fresh Cab effective?
They are inconsistent.
The evidence pack includes repeated owner reports that mice ignore, chew, or even nest with dryer sheets and Irish Spring soap. Fresh Cab gets somewhat better feedback than those two, but it is still mixed. Some owners say it reduces activity. Others say mice chew the pouches.
The practical takeaway:
- Dryer sheets: unreliable
- Irish Spring soap: unreliable
- Fresh Cab: sometimes helpful, but far from guaranteed
None of them should replace sealing, cleaning, and traps.
Pet-safe ways to prevent mice in campers?
The most pet-conscious approach is to focus on physical barriers and sanitation rather than chemical or scented deterrents.
Safer priorities include:
- Seal entry points with copper mesh, steel wool, hardware cloth, and vent screens
- Remove food and crumbs
- Store pet food securely and put it away at night
- Park on concrete or gravel when possible
- Use traps only where pets cannot reach them
- Avoid poison baits
- Be careful with peppermint oil and other essential oils, which can be a problem for cats and some small pets
For households with pets, the least risky and most dependable methods are usually the most boring ones: sealing, cleaning, and regular inspection.
How to clean up after a mouse infestation safely?
Use a slow, wet cleanup process, not a dry one.
A practical sequence is:
- Open the camper and air it out
- Put on gloves
- Spray droppings, nests, and contaminated surfaces with disinfectant or diluted bleach solution
- Let it soak briefly
- Wipe up with paper towels or disposable cloths
- Bag the waste
- Clean nearby surfaces
- Wash your hands thoroughly
Avoid dry sweeping or vacuuming fresh droppings. If you find heavy contamination, deep nests, or damaged wiring, bring in professional help.
Differences in prevention for storage vs. road trips/boondocking?
The foundation is the same in both cases: seal gaps, remove attractants, and monitor. What changes is where the risk shows up.
For storage:
- Remove all food
- Remove or seal cloth and paper
- Park on hard surface if possible
- Keep distance from brush and grass where you can
- Use wheel or jack barriers only as optional add-ons
- Check the camper monthly
For road trips and boondocking:
- Stay on top of nightly food cleanup
- Put pet food away after use
- Watch cords, hoses, steps, and jacks
- Avoid parking tight against vegetation when possible
- Inspect more often because active campsites create temporary access routes
Storage is mostly about protecting a quiet camper for weeks or months. Travel is more about managing repeated setup points and changing environments. In both situations, sealing remains the core defense.